How to Recover Deleted, Formatted Data from Macbook Air
The MacBook Air family is a line of ultraportable Macintosh notebook computers which were designed to balance both performance and portability. Like other Macbook computers, Macbook Air are not immune to data loss problems. You may accidentally deleted files with “Delete+Shift” button, empty the recycle bin carelessly to permanently remove your actually needed files or wrongly format a hard drive or external hard drive before a complete backup. Fortunately, Jihosoft File Recovery for Mac can restore your lost data from Macbook Air to working form.
This powerful application from Jihosoft has supreme usability to recover deleted/formatted files from Macbook Air with high efficiency and efficacy. It supports to recover a wide range of file types including photos, music, video, documents, email, etc from multiple storage devices such as hard drive, memory card, usb drive, external hard drive, digital cameras, etc that are attached to Macbook Air.
Macbook Air Data Recovery also provides feature-rich functionality to enhance your data recovery experience. The file filter option helps you to specify which files will be scanned and the file preview tool allows you to preview all common file formats including images, documents, video and audio clips either by thumbnail or list.
Step by Step to Recover Deleted/Lost Data from Macbook Air on Mac OS X
Step one: Start Jihosoft Mac Data Recovery on your computer.
Note: Do not save new files and do not install the recovery software or other software on the disk where you are losing files from, since any changes may cause more data loss.
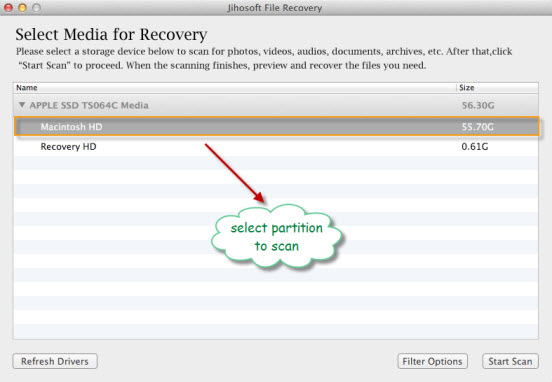
Step two: Choose scan partition the scan.
In the program main screen, highlight the partition or you would like to scan. Then hit right-bottom “Filter Options” icon.

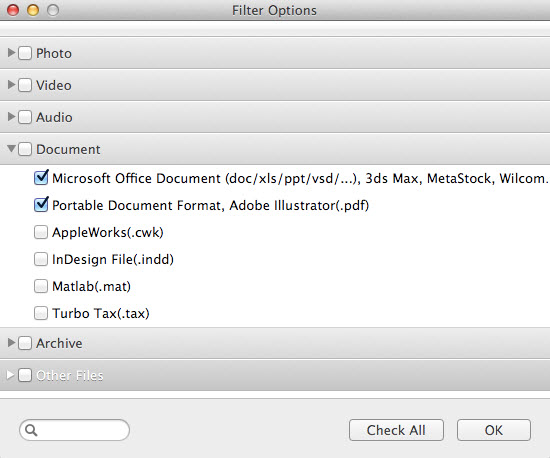
Step three: Select file types to scan.
In the opened “Filter Options” window, click each file type drop-down menu and select and check the specific file formats you would like to scan and recover. Then click “OK” and “Start Scan” button to initiate the scanning process.

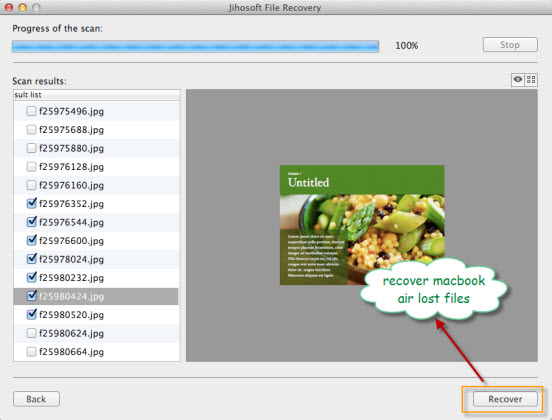
Step four: Recover Data from Macbook Air.
When the scan is finished, all found files will be presented by formats in the left panel. You can preview the file contents in the right displaying window. Check the files you want to recover, and hit right-bottom “Recover” button to save them to your defined folder.


