User Guide of Jihosoft Photo Eraser
Even a tiny object in a photo can damage the entire composition of the photo. Never want your photos to be spoiled by unnecessary stuff? In fact, there is a simple way to remove unwanted people, wires, face blemishes and other objects from a picture.
Using Jihosoft Photo Eraser to remove objects from photos is almost as easy as taking a shot. Now you can use this tool to erase undesirable objects from your pictures, such as tourists, watermarks, logos, texts, blemishes and other unwanted things without real photo-editing skills required at all.
Quick Tour of Jihosoft Photo Eraser
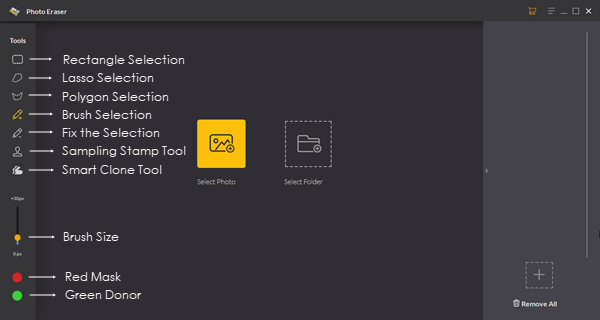
The screenshot above is of the interface of Jihosoft Photo Eraser. Along the left side of the screen is the Tools panel, where you can find all of the various tools you need for erasing and perfecting a photo. Now we will guide you through what they are and how to use them with skill.
- Rectangle Selection
- The Rectangle Tool creates rectangular shapes with Red Mask or Green Donor.
- Lasso Selection
- Simply drag a freehand selection around the object or area you want to select, and the selection will be covered with Red Mask or Green Donor.
- Polygon Selection
- Begin by clicking somewhere along the edge of the object or area you need to select, then release your mouse button. Click again to add a second point, then release your mouse button. Continue doing so until you complete the selection by clicking once again on the initial point.
- Selection Brush
- Select the unwanted object by simply painting over it. Brush size can be changed from 1px to 200px with the Brush Size tool.
- Fix the Selection
- Make a more precise selection by erasing the unwanted parts of the selection area by simply painting over it.
- Sampling Stamp Tool
- This tool allows you to copy one area in a photo, and then you can use the copy to cover any other areas.
- Smart Clone Tool
- Clone any object or part of a photo and modify its edge to the background intelligently. You can learn how to use this tool skillfully from here: How to Clone Existing Objects in Photos.
- Guide Line
- The Guide Line tool is for those complicated images where the object you want to remove has two different kinds of background.
- Guide line functionality is described in more detail in this tutorial: How to Use Guide Line to Erase Things from Photos
- Red Mask
- Mask Mode. Normally, the area you select by any selection tool will be covered with Red Mask by default, and the Red-mask area will be erased when you begin the erase process.
- Green Donor
- Donor Mode. Donor area allows you to choose which parts of the photo are used to fill the selection area. As we mentioned before, the selection area will be brushed with Red Mask preferentially, so if you want the selection area to be covered by Green Donor, please click on the Green Donor first and then make the selection with any tools.
- Green Donor functionality is described in more detail in this tutorial: How to Use Donor to Repair Broken Objects in Photos.
3 Steps to Erase Unwanted Objects from Photos with Jihosoft Photo Eraser
Now that you have learned how to use the tools in the program. Let’s go straight to the next part! With merely three simple steps you can make all the unwanted parts vanish from your photos as if they were never there.
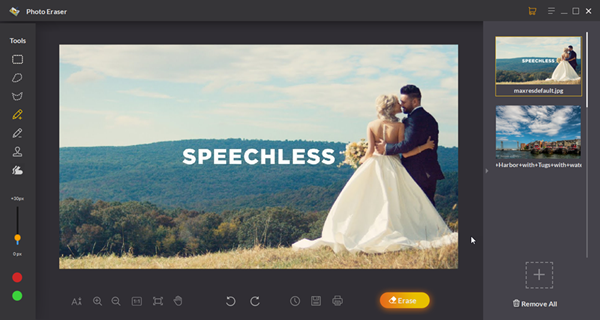
Step 1: Select Photo/Select Folder
Select and load a single image which is spoiled with unwanted stuff. Or load all the images inside a folder at once with the Select Folder option.
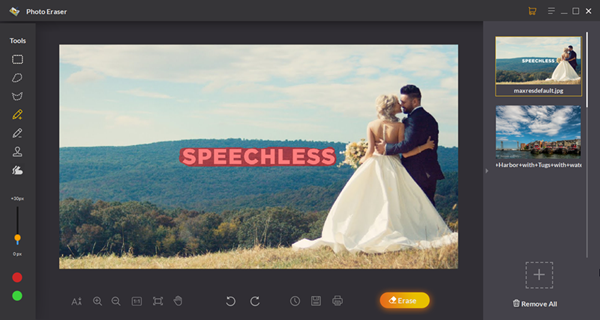
Step 2: Brush the stuff you want to remove from the photo
Selecting is as easy as this: take the Selection Brush tool and brush the unwanted object. You can use the Fix the Selection Brush to make the selected area more precise. And you can change the brush size or zoom in/out the photo to make it easier to brush a rather small area.
Note: It’s recommended to remove objects one by one, but you also can select several stuffs at once, and all of them will be removed all together when you start the erase process.
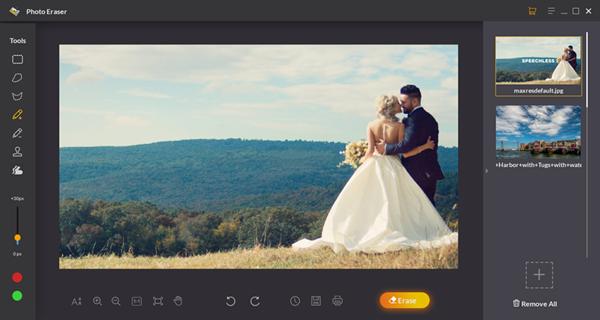
Step 3: Remove items from picture
Now, click the "Erase" button and wait a little as the Photo Eraser tool processes the picture. Seconds later, you are managed to turn a spoiled picture into a nearly perfect one!
- Tips:
- 1. Rather than trying to remove all objects at once, try brushing and applying the "Erase" button to each object one by one. You will get surprisingly great results.
- 2. Each erase procedure is unique, so you'll get a slightly different result each time you apply the "Erase" button.