User Guide of Jihosoft Photo Recovery for Mac
Part 1: How to Recover Photos on Mac
Jihosoft Photo Recovery for Mac enables users to recover photos, videos and audios from Mac & a wide range of external storage devices. If lost files are on external storage medium, connect it to your computer using data cable first and make sure it appear on your Mac as a removable disk.
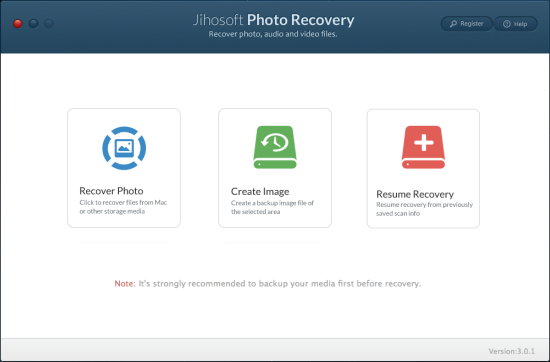
1. Install and Run Jihosoft Photo Recovery for Mac
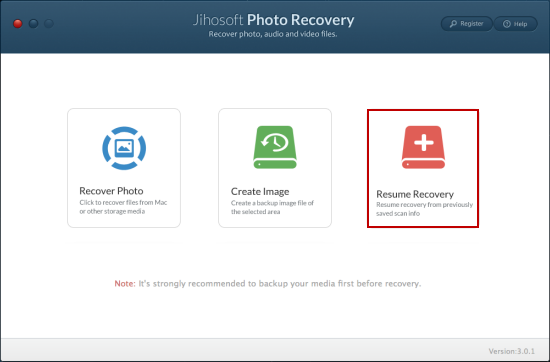
Obtain a free trial version of this program from the download icon, and then double click to install and run it on your Mac. Then you will see its main interface as here:
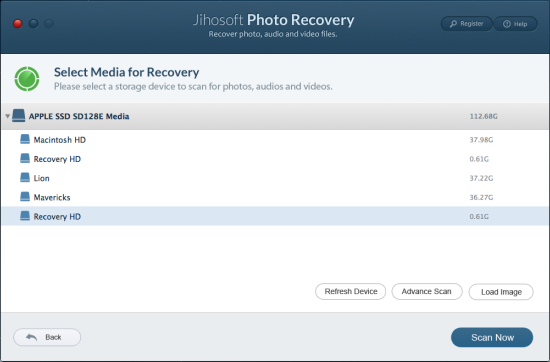
2. Select Hard Drive to Scan for Recoverable Files
Go into “Recover Photo”, then you will see all the hard drives on your Mac be displayed to you. Select the partition you want to recover files from and click “Scan Now” to scan for deleted, formatted or lost photos, videos, and audios from it.
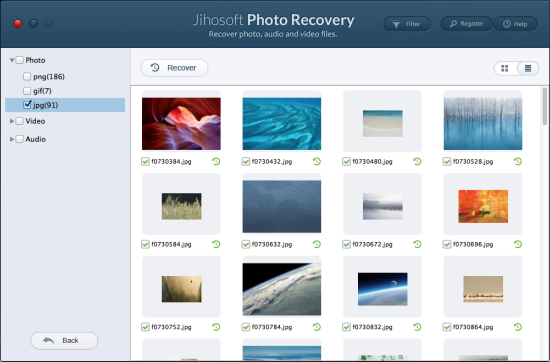
3. Preview and Recover Photos on Mac
All the found files will be listed for you in categories after the scanning process is finished. Preview to check if they are the ones you want, select those you need and click “Recover” to get them back.
Part 2: How to Create Image Backup File
The underlying principle of data recovery is simply finding data that still exists on the hard drive but which currently can't be located by the operating system. After a file is deleted or formatted from your drive, many operations may cause it be overwritten. To recover files that are covered by new data totally is nearly impossible. So it’s suggested to backup your media first before the recovery.
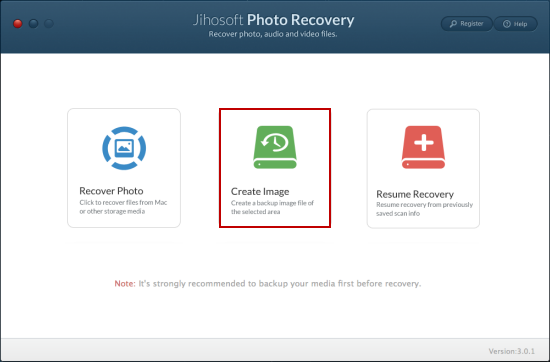
1. Run Jihosoft Photo Recovery for Mac and Select “Create Image”
After you launch the program, on the main screen, select the option “Create Image”. Then you will be brought to the next step.
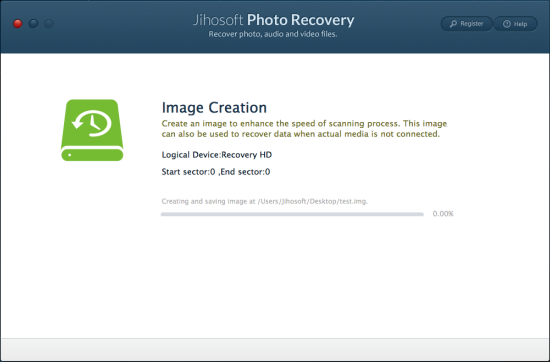
2. Choose your Device and Begin the Image Creation
From the detected drive list, select the one which you want to create an image backup file and click “Create Image” to begin. When the image file is created successfully, you will be asked if you want to recover data from the latest created image file.
Part 3: How to Resume Recovery
If you have scanned your device incompletely before, you can select it to resume recovery the next time.
1. Run the Recovery Tool and Choose “Resume Recovery”
On the main screenshot of this recovery tool, hit the option “Resume Recovery”.
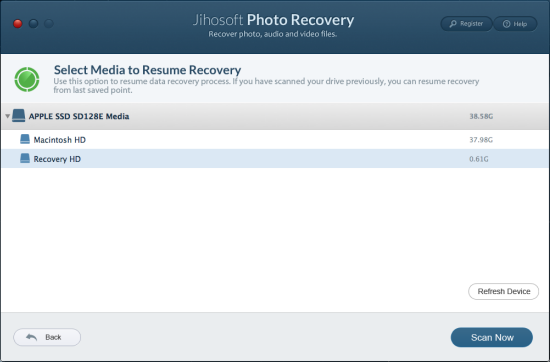
2. Select a Media and Resume Recovery
From all the drives hooked up to your Mac, select the one that you need to resume recovery and click “Scan Now”. After that, the scan will begin from last saved point automatically.
Watch the Video Demo