The Correct Way to Create and Make Curved Text with Photoshop
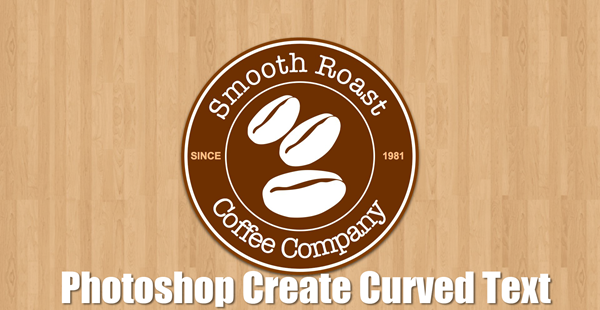
Did you often come across that one attractive logo has got a beautifully curved text? Well, they are indeed not difficult to do if you know the correct way of how to curve texts. So do you want some curved logos or merely a curved text for your next school project? Well whatever might be your needs, this guide is going to help you through the entire process of curving a text.
Most of the people end up using the Warp Text Tool to create curved text. However, unlike this one-key operation Photo Eraser that can erase unwanted texts and other objects from pictures flawlessly, the one-click Warp Text Tool just makes the text look really deformed and ugly.


Then what is the correct way to curve text flawlessly? Well, you will learn it soon but before that let us take a look at some of the reasons why your curved text might be looking deformed and how they can be avoided.
What Makes The Curved Text Look Deformed?
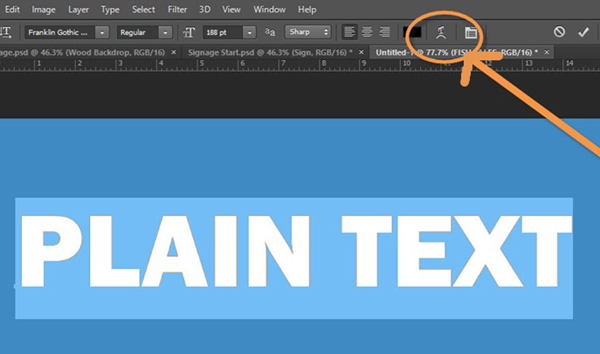
One of the first and the foremost reasons why your curved text might be looking deformed is that you have used the Warp Text Tool. This tool is quite easy to find for most of the beginners because a lot of times when you select the text tool you will find the this tool on the options bar. So this is an easy and fast option by which you can create curved text, and a lot of people use it. But the results look highly unprofessional and ugly.
The warp text tool should not be used for such cases. You can use it when you are actually trying to make your text a bit bulgy or making it look pinched. Apart from these, never use that tool to create a neat curved text as your results are going to look amateurish. So what is the solution to make curved texts? Keep reading to know it.
How to Curve Text Easily?
The right way in which most professionals are working is to construct a vector path. Then the text can be added to this vector path to make the text look curved. Let us take a look at the steps of doing this procedure.
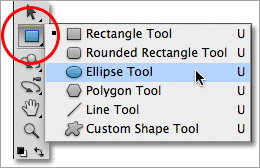
Step 1. Choose the Ellipse Tool which you will find right in your toolbar. Once you have selected it, you can select any kind of shape that you feel like. Also, if you want a custom path that is going to be followed by your text, then you need to do something. You need to choose the Pen tool (p) from the toolbar and then draw your very own custom path. Ellipse Tool is, however, the most widely used when one is making curved texts for logos. Lets us now see how we can proceed with the work.
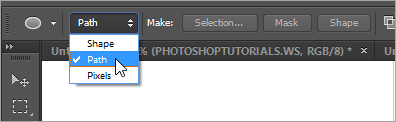
Step 2. Right below the Photoshop menu bar, you will find the options bar located there. You need to choose the drop-down menu that is available over there and then select the Path option. Then you can draw any path that you feel like on your document. To make a perfect circle you need to hold the shift key and then drag your mouse over the screen. The
same is also applicable for the other tools like the square one of the polygon one.
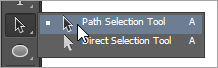
You can reposition the path if you have messed up somewhere in between. For this, you need to switch to the tool for path selection and then drag the path to any part of the screen you feel like.
Step 3. Up next you need to switch to the Text Tool (T) which you will find over there and then you need to click anywhere you want over your path. When you try to hover the mouse over the path that you have drawn, you will see that the cursor changes to a text cursor and there will be a curved line visible across it. Now it is your time to type in the text that you want as curved. You can even centre align the text that you want to write. All you need to do is to go to the options bar and set it.
Step 4. Now that the text is present, but it will not be aligned correctly. It’s up to you to do it. You can also position the starting as well as the stopping points for this text. You are going to see 2 points on the path. Up next you will have to choose the path selection tool, and then you need to drag the point in order to reposition the entire text that you wrote. The cursor will now change like a text cursor that has got two arrows in it. While you are dragging the text, you will need to hold the shift key if you feel like placing the two points right at the center.
Step 5. It might happen that the text is too large and it is not cantered along with the logo that you are designing. This can be fixed quickly as well. All you need to do is to resize the path with the help of the Transform Tool that is present in your toolbox as well.
You can press the Ctrl + T keys, or you can also go to edit and then choose the free transform option. In order to scale your path, you will need to hold the Alt + Shift keys and then drag the extreme corner nodes of your transform box. In order to apply these new changes to your work, you will have to press the Enter button.
Overview
Now that you know how to make a perfectly curved text with the help of Photoshop, just implement it straight away. You will be amazed by the beautiful results and the difference in the work. Keep in mind not to use the Warping Tool if you want to design it like a professional. These 5 steps are enough to create any kind of curved text that you want.