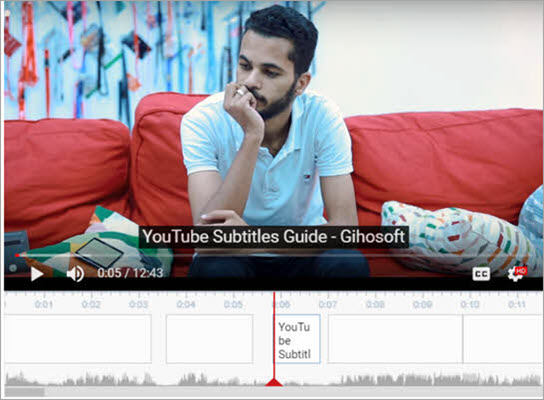
3 Main Methods Guiding You to Add Subtitle to YouTube Video
YouTube is considered to be the biggest video streaming platform in the world, and since it was created, millions of videos have been uploaded daily. If you are looking for a place to spread a word or to market your business, you can make the most of YouTube. Due to the enormous number of users it has, you will have to provide understandable content for everyone, so it’s hard to create a video for each language a human can speak. You will need to add subtitles to your YouTube video so that everyone watching it can understand, widening your audience.
Luckily, the company has put that into account, and it has provided you with different ways and methods allowing you to add subtitles to YouTube videos online in many different languages by yourself or by using the algorithms it has. Next, we will show you several methods on how to add subtitles to YouTube, and I will try my best to briefly explain every method to make it easier for you to apply.
Method 1 – Upload a Subtitle File
The first method is uploading a subtitle file to allow the audience to select the translation they want and the language they speak. This method might be the hardest one, not hard in how to make it, but it’s the most time-consuming method among all these we will list. But, on the other hand, it’s the most accurate one as you put every sentence you say just in the time when you say it.
- Create a text file using TextEdit on Mac or Notepad on Windows which are both free. Also, you can use any other text editor or subtitle editor of your own choice. Just like this picture below, you should add a number to specify each line of your translation, and then give its range of time.
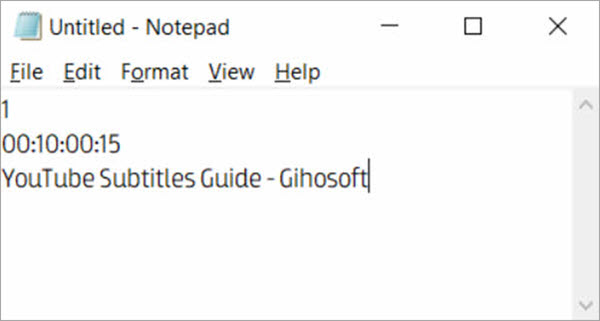
- After that, you should type the words according to the sentence you say or translate. Make sure you use the correct format referring to the picture above so that YouTube can understand your subtitle.
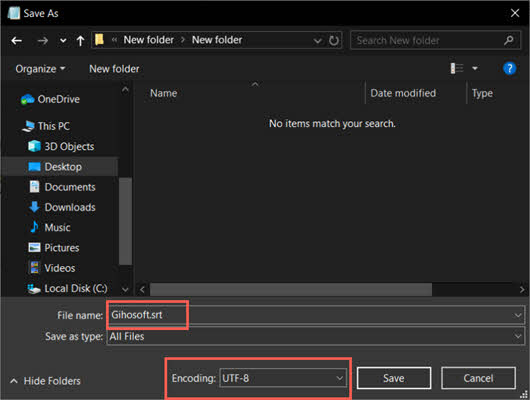
- Save this text file with a name followed by the .srt extension for subtitles. Don’t forget to select UTF-8 in the Encoding option so it can function properly.
- Now you can upload the text file to YouTube. Log in YouTube with your Google account, press My Channel, Creator Studio and then Video Manager.
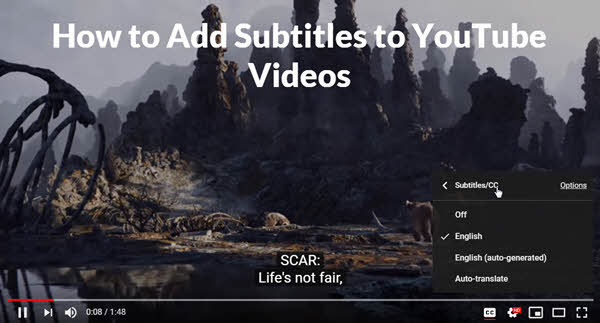
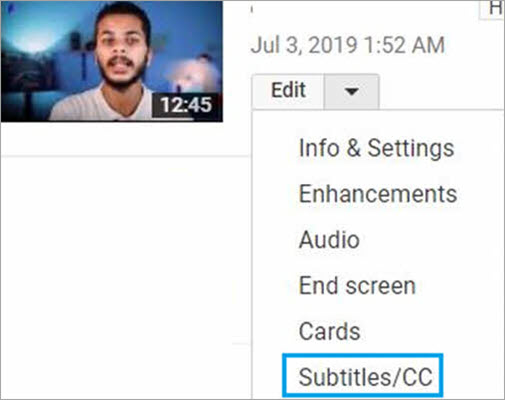
- From a list of videos, select the one for which you have created subtitles, and then click on the dropdown arrow under its name to choose Subtitle/CC.
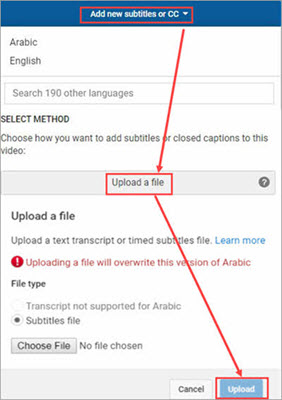
- Next, click on the button Add new subtitles or CC to select the language for your subtitle. Then click Upload a file, and you will see popup window for you to select your subtitle file from the local storage. After selecting it, tap Upload and you will have the subtitle on the YouTube video.
Having finished those steps above, you can check out the video and its subtitle by yourself. Make sure everything is OK and click on Publish to add the new subtitle to the current video or simply publish it as a new one.
Method 2 – Use Transcribe and Auto-Sync Feature of YouTube
The second method is much easier but it might not be as accurate as the first one, for it depends on how your words are clear in the video. Simply, it works by adding the whole script of the video to YouTube, and it will automatically synchronize the script with your video, which means every word you have written will be synced with the video playback.
- Log in to your YouTube account on the web. Click My Channel, Creator Studio and then Video Manager. When you see a list of your videos, just select the one you want to translate and then click the dropdown arrow.
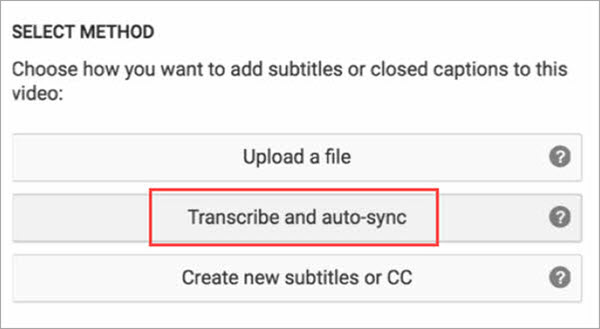
- Now you should tap Subtitles/CC, and then Add New Subtitles or CC to determine the language you want to use. After that, select Transcribe and auto-sync and you will get a blank text area for you to type the whole script of your episode. When you finish that, click Set timings and then the text will get synced with the voice automatically.
The worst thing about this option is that it doesn’t allow you to add a translation with another language by yourself, but YouTube itself can provide viewers with some other languages which will be auto-translated by Google Translate. - Make sure the subtitle can be seen on your video and then you can publish it.
Method 3 – Use YouTube Subtitle Generator Tool
- Go to your YouTube account and tap My Channel, Creator Studio and then Video Manager. From the list of your uploaded videos, select one video and click the dropdown arrow to select Subtitles & CC.
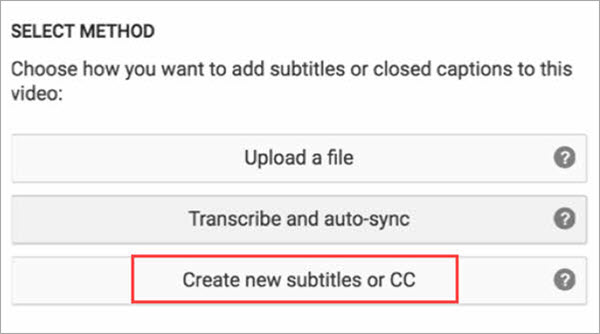
- There is a blue button called Add new subtitles or CC. Click it and tap Create new subtitles or CC. A text area shows up, and you can choose one language for your subtitle. Like the previous two methods, selecting the language can help viewers easily find this video on the basis of their languages.
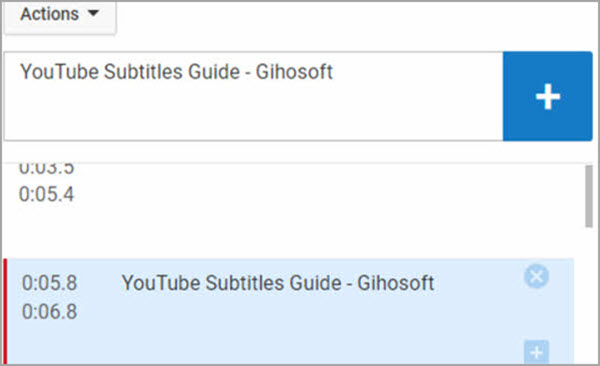
- There are two boxes adjoining each other, one of which is a video player for you to play/pause the video to select certain time point to add subtitle, the other is the text box for you to type the text for the video.
If you need to change the start or stop point of a certain time range, you can click the blue + button to select the timing of the subtitle by dragging the bar.
Advantages and Disadvantages of Each Method
Each of the above-explained methods has some advantages and disadvantages. For instance, the best thing about the Uploading File method is the accuracy of your subtitle, but it takes much more time and effort than other methods. The method of transcribing the script is easier and timesaving, but you can only add captions in the spoken language and can’t translate it.
Generally speaking, the last method is the best one among them as it allows you to add subtitles in any language. In addition, it’s interface is also easy to use without having to type everything by yourself like timing or numbering.
How to Add Subtitles to Others’ YouTube Videos
YouTube is a community after all, which is why you are allowed to add subtitles to other people’s videos so that more people in your country can watch and understand these videos gaining more information or knowledge. You can follow these steps stated below:
- Open a video on YouTube, and click on the gear icon below it. Then tap Subtitle/CC and choose Add subtitles/CC.
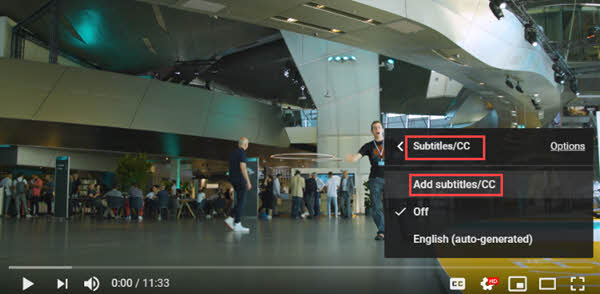
- You will be taken to a page where you can add the subtitle you want by using any of the previous 3 methods.
After that, your subtitle will be sent to be reviewed by the video owner and it will be published by YouTube once accepted. If you find some of others’ videos are great, you can easily get them downloaded for later offline playback using Jihosoft 4K Video Downloader which also allows you to download videos from other popular video sites like Facebook, Twitter, Instagram, Dailymotion, Metacafe, Vimeo, etc. By the way, once you need to convert the downloaded video for some reasons, you can refer to another tool called Jihosoft Video Converter for it is aimed at converting videos to any other video/audios formats you prefer.


Conclusion:
By reaching this line, you now have learned how to add subtitles to YouTube videos online whether they are your videos or others’. You can select the best method based on many factors, such as duration, language, etc. But the most important thing is to share your comments in the comments section below, share the article with your friends and family and keep following our website to learn a new thing every day.