How to Reset Network Settings on iPhone and Fix Connection Issues
The settings related to a phone’s network specifications and features are among the most important in an iPhone. Without it, you will not be able to access the Internet, send or receive iMessages, or write emails.
Lucky to say now, even though you are not so good at any network related settings, you can always fix the network issue on your iPhone with the one-button solution ‘Reset Network Seeings’, a quick fix offered to general users.
For your any potential confusion, we will discuss what this one-tap trick is and when it should be applied, along with little tips to download iOS app over 150 MB from App Store using cellular data.
What is “Reset Network Settings” On iPhone
Reset Network Settings is basically a way for a user to revert his/her iPhone to its original network settings. Because of this, it has become a popular way to fix any potential issues that you may face while using network. When you perform a Network Reset on your iPhone, the network settings will return to how it was when you just bought the smartphone.
Among all these are affected by this action: Wi-Fi, cellular and Bluetooth settings. What exactly does this mean? It will result in your iPhone getting removed from your previous Wi-Fi connections as losing all the preserved password. You may also have to set Bluetooth connections with other devices again.
How To Reset Your iPhone’s Network Settings
To reset the network settings on an iPhone is actually easier than most people think. It will come in handy especially when you are having network issues.
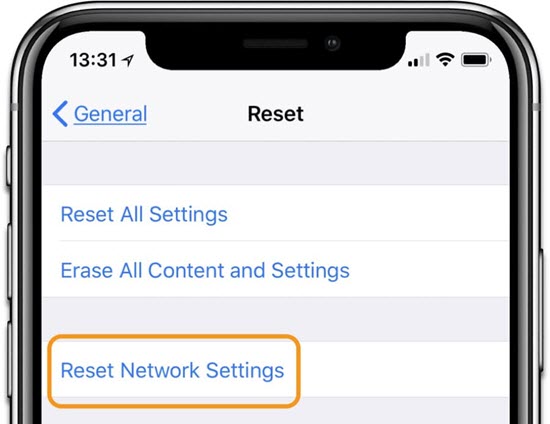
- Go to the Settings of your iPhone.
- Go to General and then find Reset.
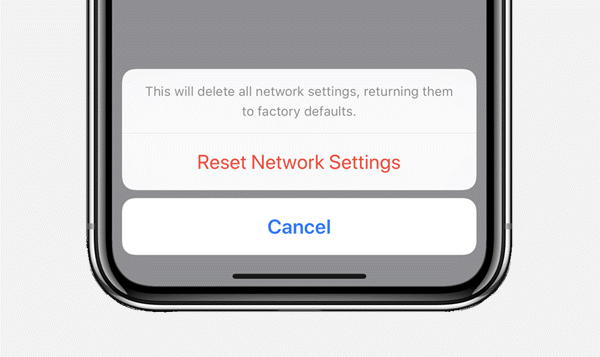
- Tap Reset Network Settings and confirm through the pop-ups.
Don’t worry, this will only deleted all the saved Wi-Fi connections and their password from your device, but not erase your whole phone. All your data will remain the same.
When to Reset iPhone Network
The first two parts of this article have already informed you about what the Reset Network Settings is and how to perform it. Now, when exactly will it be used? Here are six most common problems it can fix:
1. Wi-Fi Not Working
If you recently updated your iOS version to the iOS12 and you are not able to connect to a Wi-Fi afterwards, resetting network settings is a smart move. This can also be applied if the Wi-Fi connection is not as fast as before.
2. Network Not Working
Networks may fail to work in iPhones sometimes. Do not panic, you can just go and see if resetting the network settings will do the trick. When you rejoin the networks you will see that everything is already fixed. If not, then you might go to a repair shop or ask Apple Support for help.
3. Can’t Send and Receive iMessages
Having trouble with your iMessages? If it has something to do with sending and receiving, then this may be easily addressed by resetting the network settings of your iPhone. iMessages sometimes fail to work when there is a problem with network settings. Resetting network settings works with just about any iMessage issue you may be having.
Also read: How to Recover Deleted iMessages from iPhone/iPad
4. No Service
Most people would advise that the “No Service” issue would be best solved by tapping the Airplane Mode setting. The trick works most of the time. But if the problem persists, the better solution is resetting network settings.
5. Having Trouble Connecting to Wi-Fi Network
If your phone cannot connect to a Wi-Fi network that you regularly use, there may be issues with your network settings. You can first try to Forget the Wifi and reconnect it. If not help, then reset the network settings and then enter the right password so you can connect again.
6. iPhone Can’t Be Synced
You may see the message saying the device couldn’t be synced to iCloud due to connection error. Resetting network settings works to fix this issue. Also, you may want to reboot the device before trying to sync again.
How to Download iOS Apps Over 150MB via Cellular Data
Since iPhones are typically programmed to limit the size of its individual app downloads through cellular data to less than 150MB, users might encounter challenges with regards to their app installations. Thankfully, you can do something to fix that.
- Turn off your phone’s Wi-Fi connection in the iPhone Settings. Make sure that you enable your cellular data as well. This will be necessary to proceed to the next step.
- Go to the App Store and find an application you need, check if it is over 150 MB.
- Click on ‘Get’ to purchase and download the app.
- A warning message will pop up if it is bigger than 150 MB. Just tap OK. Usually the to-be-download app icon will show on your screen, but it only start downloading when you connect to Wifi.
- Then open the Control Center and then switch on Airplane Mode.
- Once Airplane Mode is on, press the Power button on the side of the iOS device. Shut down your device.
- Restart your iPad or iPhone. Once it is on, go to the App Store. You will see a “No Connection” message on your screen. Slide up the control menu and disable Airplane Mode.
- If all the instructions have been followed well, you would see that your app is already downloading even if it is more than 150MB in terms of size. You can check this by going to Updates > Purchased.
Another method of downloading apps over 150MB without Wifi is through back-dating. The process involves the following procedure:
- Launch the ”Settings” app of your iPhone.
- Then, click on the General> Date & Time.
- Click on ‘Set Automatically’ to Off.
- Change the date forward by 2-3 days.
- Back to the home screen, you will see the app starting downloading. After it’s done, again turn on ‘Set Automatically’ in Date & Time.
Conclusion
Resetting network settings is a common solution to many iOS related problems. This is a handy solution for almost every iOS including iOS 12, especially when problems occur in the network connnecting of iPhone. Hope that you can easily catch on these method in time of need.
By far, downloading apps more than 150MB through mobile data is still not an option available on App Store, and all we could use is the bug that may be fixed in the next iOS update. If you have any problem or other good suggestion, welcome to leave a comment below.