How to Root Galaxy S4 (The Most Complete Guide)
To run special applications, custom ROMs, and free up internal storage etc. on your new Samsung Galaxy S4, rooting is necessary. If you are wondering how to root galaxy s4, read on this post to get the most complete guide.

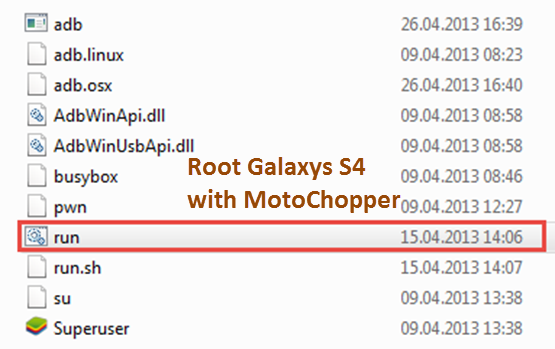
Option 1. Root Samsung Galaxy S4 with MotoChopper
This root method will work on all Qualcomm-based Galaxy S4 running Android 4.2.2 such as Sprint SPH-L720, T-Mobile SGH-M919, US Cellular SCH-R970, Canadian SGH-i337M, Rogers, Bell, Telus, and other Qualcomm S4s.
Step 1. Enable USB debugging on your Samsung Galaxy S4.
Step 2. Plug Galaxy S4 into your computer via a micro-USB cable, you should see “Allow USB debugging” window pop-up on your phone, hit “OK”.
Note: If you don’t see it yet, just skip this step and check back on Step 5.
Step 3. Download and install Galaxy S4 Windows driver(For Windows users). Go to Device Manager on your computer and make sure you have something like “Samsung Android ADB Interface” or some type of “ADB Interface”. If you don’t see it, simply install galaxy S4 drivers. (If you are using Mac or Linux, skip this step.)_
Step 4. Download Motochopper.zip and unzip. Open terminal and type commands.
For Windows, double-click on “run.bat” to start the rooting script.
For Mac or Linux, type:
cd Downloads/motochopper
cd motochopper
chmod 755 *
sudo sh run.sh
Step 5. Tap “Enter” to begin rooting. If you skipped Step 2, when “Allow USB debugging” window pop-up on your phone, tap “OK” and hit “Agree” on your phone if you see “Verify apps?” window pop up during rooting.
Step 6. Click “Enter” and your Galaxy S4 will be rooted and will reboot. After that, a new app named “Superuser” in your app drawer will be displayed.
Step 7. Make sure you have full root on your Galaxy S4. You can use root checker apps to do the job.

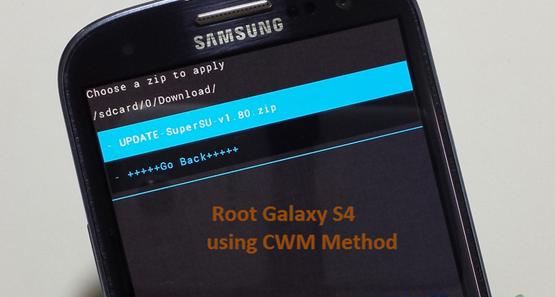
Option 2. Root Samsung Galaxy S4 Using CWM Method
Currently, this method is only for Octa-core GT-i9500 , GT-i9505, AT&T SGH-i337, Sprint SPH-L720(need install custom ROMs), and Korean (E300S, E300K, E300L).
Step 1. Enter galaxy s4 into “Download Mode”. Power off your phone and press Volume Down, Home, and Power buttons at the same time for a few seconds.
Step 2. When you see the warning screen, hit the Volume Up button to enter ODIN Download mode.
Step 3. Plug in the device via USB to your computer..
Step 4. Download CWM recovery for your Galaxy S4. Also download ODIN, Samsung USB Drivers, and SuperSU Zipfiles.
Step 5. Go into the Odin folder and run the odin3 v1.85.exe file. Make sure a yellow highlighted box shows up on the left side of Odin and only “Auto-Reboot” and “F.Reset Time” is marked. Then choose PDA and locate the ClockworkMod Recovery tar file. Click “Start” and Odin should say “Pass” in a few seconds, your phone will reboot.
Note: If no yellow box showed, double-click on the Samsung USB drivers exe file you downloaded earlier and install drivers, then unplug/re-plug the micro-USB cable to your phone.
Step 6. After your S4 reboots, copy the SuperSU zip file you downloaded earlier to anywhere on your Galaxy S4.
Step 7. Power off your S4 then hold down Volume Up, Center Home, and Power buttons together.Once your phone vibrates ONLY let go of your power button.
Step 8. After that, you should enter in CWM Recovery, select “install zip from sdcard”, then “choose zip from sdcard” > “0/”.
Step 9. Browse and find the SuperSU zip file you copied over earlier and select “Yes”. This will install su binaries and SuperSU superuser app on your S4.
Step 10. Once the installation is done hit “++++++Go Back++++++” and
choose”Reboot now”. After rebooting, you should find SuperSU app in your app drawer.

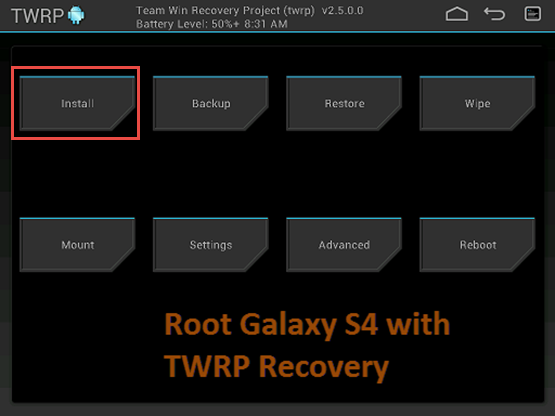
Option 3. Root Galaxy s4 by Using TWRP Recovery
Some models do not have CWM recovery available. Thus, we conclude another root method using TWRP recovery. TWRP recovery is just as good as CWM recovery and installation is nearly identical but using different menus.
This method works for GT-i9505, T-Mobile Galaxy S4 SGH-M919, Sprint Galaxy S4 SPH-L720, Canadian Galaxy S4 (Bell, Rogers, Telus), US Cellular Galaxy S4 SCH-R970(For Android 4.2.2, 4.3, and 4.4.2)
Step 1. Power off your Galaxy S4 and press Volume Down, Center Home, and Power buttons together.
Step 2. Next, you should see the warning screen, let go of all the buttons and hit the Volume Up button.
Step 3. Connect your Galaxy S4 to computer via micro-USB cable.
Step 4. Download TWRP recovery for your Samsung S4. Also you need to download ODIN, Samsung USB Drivers, and SuperSU Zipfiles.
Step 5. Unzip the Odin zip file and run the odin3 v1.85.exe file.
Step 6. Install Samsung USB driver(optional). If you see a yellow-highlighted box, skip to next step. If you don’t see it, run the Samsung USB driver .exe file you downloaded before, then reconnect your galaxy s4.
Step 7. Flash TWRP recovery onto your Galaxy S4 by hitting “Start”. Once you see “PASS”, you s4 will reboot. Then copy the SuperSU zip file you downloaded earlier to anywhere on your Galaxy S4.
Step 8. Reboot into TWRP recovery by pressing Volume Up, Center Home, and Power buttons together. Let go of the buttons when you see “recovery booting”.
Step 9. In TWRP recovery, select “Install”, then select the CWM SuperSU zip file you copied over earlier.
Step 10. Swipe to right to flash the CWM SuperSU zip file then reboot system. After rebooting, you should find SuperSU app in your app drawer.

Other Options: Root Galaxy S4 with Rooting Tools
Also, there are many rooting software available to help you root Samsung galaxy s4 in a few clicks, like Kingo Android Root, SuperOneClick(Free), SRS-Root (Free), One Click Root (Paid: $29.95) etc. We cannot guarantee that these tools work for every model of Samsung Galaxy S4, as there is no standard approach to root all devices. Thus, some researches must be done on your part.
For more info about rooting tools, you can refer to this article: How to Root Android. If you still have problems to root galaxy s4, don’t hesitate to contact us or leave your comments below.