How to Put iPhone/iPad in DFU Mode?
What Is DFU Mode?
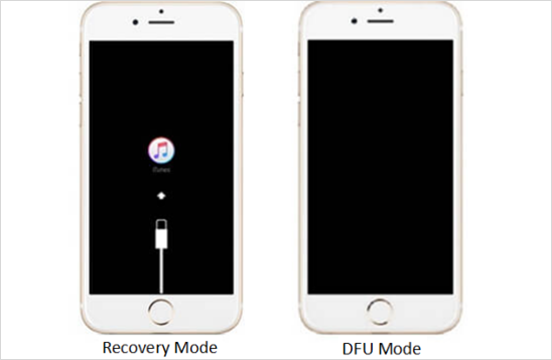
DFU (Device Firmware Upgrade) mode is regarded as the ultimate flash state that can put your iOS device into where it can interface with iTunes but does not load the iBoot (bootloader on iOS devices). It allows all devices to be restored from any state. The screen will appear totally black in DFU mode, so you can’t tell whether the device is in DFU mode or powered down from simply looking at the screen.
How to Put iPhone/iPad/iPod into DFU Mode?
Follow the steps below to learn how to enter DFU mode on your iPhone (also applies to iPad and iPod Touch):

For iPhone X, iPhone 8, iPhone 8 Plus:
Step 1: Plug your iPhone to a Mac or PC and open iTunes.
Step 2: Press (and quickly release) the volume up button, then press (and quickly release) the volume down button.
Step 3: Press and hold the side/on/off/power button until the screen goes black.
Step 4: Now press and hold both the side and volume down buttons for about five seconds, then release the side button until you see an iTunes popup saying “iTunes has detected an iPhone in recovery mode”. After that, let go of the volume down button.
Note: If the screen is black after the last step, then you have entered DFU mode successfully. If not, try the steps all over again.
For iPhone 7, iPhone 7 Plus:
Step 1: Turn Off your iPhone and connect it to your Mac or PC.
Step 2: Open iTunes on your computer if it hasn’t open automatically.
Step 3: Press and hold Side button on your iPhone for 3 seconds. Then, press and hold volume down button while still holding down the Side button. Keep holding both buttons for 10 seconds or so. (If you see the Apple logo, you’ve held them too long and will need to start again.)
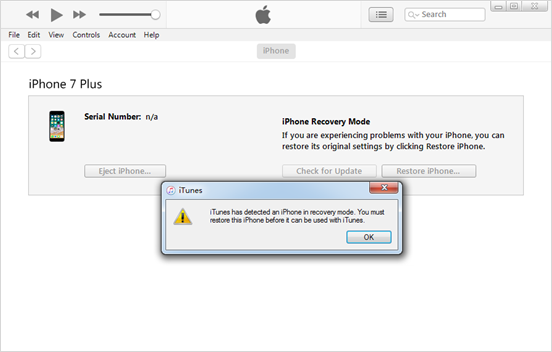
Step 4: Let go of the Side Button and keep holding volume down button for about 5 seconds. (If you see the “Plug into iTunes” screen, then you’ve held it too long and will need to start again.) If your iPhone screen stays black and you see a popup showing on your iTunes saying “iTunes has detected an iPhone in recovery mode. You must restore this iPhone before it can be used with iTunes”, then you have entered DFU mode successfully.

For iPad, iPod Touch, iPhone SE Or Earlier:
Step 1: Connect your iPhone to a computer using USB cable and open iTunes.
Step 2: Press and hold both the On/Off button and Home button on your iPhone for eight seconds. After that, release On/Off button. Keep holding Home button until you see the prompt on iTunes telling you that your iPhone is detected and is in recovery mode.
Note: Under such circumstance, the prompt represents for DFU mode as well as recovery mode. And your iPhone will stay black screen at that time. If you fail to enter DFU mode, retry all the steps.
Things You May Want to Know:
Speaking of DFU mode, you must think of recovery mode. Many iOS users don’t know the difference between them. Below is a brief summary of their difference.
What Is Recovery Mode?
Recovery mode is a failsafe in iBoot used during standard upgrades and restores, which means you can’t downgrade your device’s firmware to a lower version than its original one. It is usually used to reflash iOS device when the current OS is damaged or your device is undergoing an upgrade via iTunes. If you get stuck in recovery mode, you can exit it easily as well.
Main Difference Between DFU Mode And Recovery Mode
The Main difference between the Recovery mode and DFU mode is iBoot. iBoot acts on restore process on recovery mode to make sure you are flashing a firmware version greater than or equal to the current one. Therefore, firmware downgrade is not allowed in Recovery mode. While, this can be done in DFU mode, which bypasses the iBoot so that you can downgrade or upgrade firmware in DFU mode without limitation.
