How to Delete or Hide Purchased Music on iPhone, iPad and iPod Touch
It may happen to you that the music or song which you purchased from iTunes needs to be hidden from others. Some favorite song of yours might just be secret for you, which you want to keep only with yourself due to various reasons.
Or you just need to delete a song or music that you downloaded mistakenly or ot so favored by you any more.
In such cases, to hide or even remove the songs from your iPhone will be the best solution. And here in this article, we will walk about three easy tips to hide or delete music on iPhone with/without iTunes.
Tips: If you lost important voice mails or voice memos, Jihosoft iPhone Data Recovery will be your best choice to get back the deleted media files from iPhone easily.


How to Hide Your Apple Music on iPhone
Apple does gives you the freedom to hide your music from others in Apple Music. Just deselect the “show all” label on settings and all your music will only be viewed by you.
This feature will hide all your personal favorite music from others who want to peep at your musical taste and you’ll have all your privacy on iPhone. And here are all the detailed steps.
- Go to the Settings > Music.
- Turn off the switch of ‘Show Apple Music’.
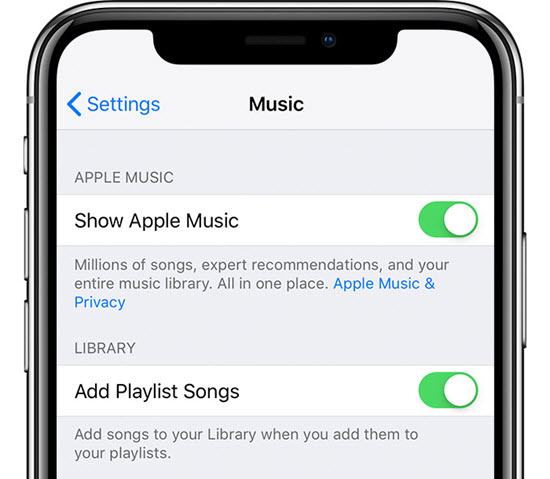
This will hide all the song tracks that you purchased from iTunes Match on iPhone. If already the songs have been downloaded on your phone, it will not remove the track.
How to Delete the Purchased Music via iPhone Settings
It might happen that you have a music or song that is occupying your iPhone storage for a long time and you’re least interested with it. So, instead of keeping it as before, deleting those unwanted stuff directly from your iPhone will relieve both your and your device. And here are the steps to remove your purchased music from iPhone.
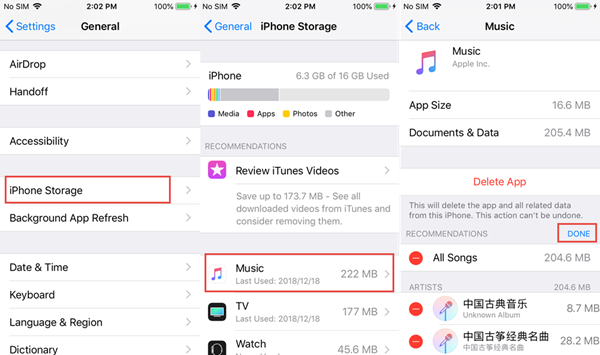
- Go to Settings > General > iPhone Storage.
- Find the Music label and click into it.
- Then, you will see all songs on your iPhone listed there. Click on ‘Edit’ and you can delete songs by swiping left one by one or delete all by ‘All Songs’.
How to Hide or Delete Your Purchased Music on iPhone from iTunes
In this section, we will tell you how to delete or hide your purchased music from iTunes through your Mac or Windows OS. All you have to do is, to delete those pruchased songs that you want to get rid off. Also, you can select a particular track that you want to hide from others in your iTunes music library. After that, sync your iPhone with iTunes and all of your action will takes affect on your iPhone music library on iTunes as well.
- Launch the iTunes on your computer (Mac or Windows).
- From the iTunes menu go to the Store > Sign in with your Apple ID (If, already logged in, choose View Account).
- Select the iTunes Store (the home icon on the top bar)
- Select the “Purchased” option under Quick links.
- Now, select the “Music” from the top of the iTunes drop-down window).
- Mouse-over a song or track and click on the ‘X” icon later appeared to hide the particular purchased music.
- Navigate back to the Library (Click on the Library option from the top right).
- Also delete the tracks with the cloud icon if any (They can only be removed from your local library but not from iCloud).
- Sync iPhone with the iTunes music library. Automatically, it will remove all the purchased music from your iPhone.
- Now, on your iPhone, go to Settings > iTunes & App Store and turn off the “music switch.”
Final Words
These are 3 easy ways to hide or delete your unwanted tracks from your iOS device. Music is something that we listen to sooth ourselves and enjoy the essence of it, but not all songs suit us, hence these tips will be quite helpful in time of need. If you have any question or other useful tips related, welcome to comment down.