How to Convert iPhone HEIC Photos to JPG
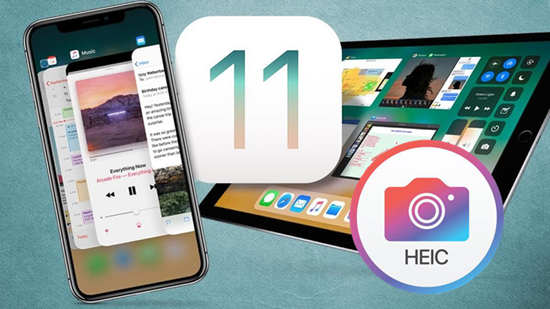
What is iOS 11 HEIC Format Photo?
As the iOS 11 starts rolling out, Apple adopted a new image format called HEIF (High Efficiency Image Format) and the previous JPEG file format is now replaced with HEIF and the corresponding HEIC (High Efficiency Image Container). This new image format is very efficiency on storage, which can save up to 50% of storage thanks to better compression.
This new .heic file extension works fine with any iOS 11 device but you will soon become stuck when you want to share this kind of image file to an Android device or to your Windows PC because they are not compatible with HEIC photo format. Even worse, not all Mac computers are able to open HEIC files by itself, unless your Mac is running the latest version of OS X, High Sierra. If you want to convert iOS 11 HEIC to JPG, you can find the best 2 solutions for HEIC conversion here, so no need to worry as of yet.
Solution 1: Use HEIC To JPG Converter
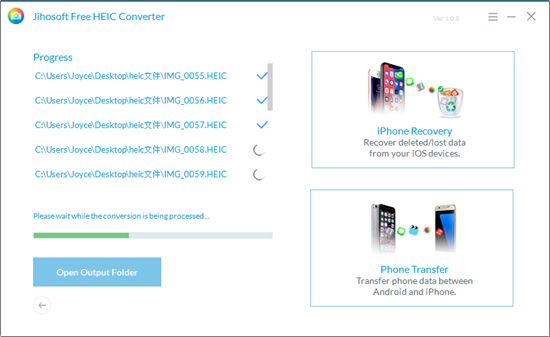
One of the solution is to use computer-based HEIC to JPG conversion tool called Jihosoft Free HEIC Converter. Depending on its simple drag-and-drop system, you can quickly turn HEIC file into JPG that your Windows/Mac computer is able to open. Follow the steps below to take advantage of this program, and then you will find that the HEIC photos will never be a problem for you.

Step 1: Copy the HEIC photos from your iDevice to computer in advance.
Step 2: Download, install and launch the above iOS 11 HEIC Converter on your computer.
Step 3: Click on the “Add” button or drop the HEIC files directly to add the files to the list.
Step 4: Choose the output folder location according to your need, and click the “Convert” button to start HEIC to JPG conversion on your PC. After that, you can click on the blue button at the bottom left to open the output folder and check the converted images.
Solution 2: Convert HEIC to JPG with Google Drive
If you have installed Google Drive on your iPhone or iPad, you can upload the selected HEIC photos to its cloud storage service, or to say you can simply go to your device’s Photos app and select the HEIC photos to share to Google Drive. In this way, these HEIC files will be converted to JPG format automatically, and you don’t need to do anything else except selecting original file size when you are asked to send in which size, if you want to get the best image quality. One thing to remember is Google Drive will save and rename the photos to somewhat like File_000.jpeg instead of retaining their original file names.
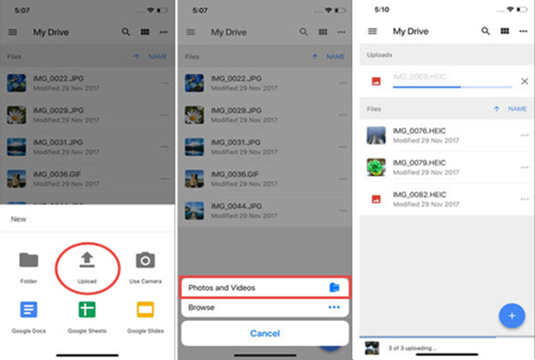
Subsequently, you can download those images from Google Drive, and view/edit them on an Android device or your computer.
Tips:
When speaking of sharing images, iPhone device will automatically transformed HEIF pictures into JPG. Just as you share HEIC photos to Google Drive, when you email an HEIC photo, or send it with an iMessage, your device will also convert the photo to JPG in real-time by itself.
How to Make iPhone Camera Shoot JPEG Again in iOS 11?
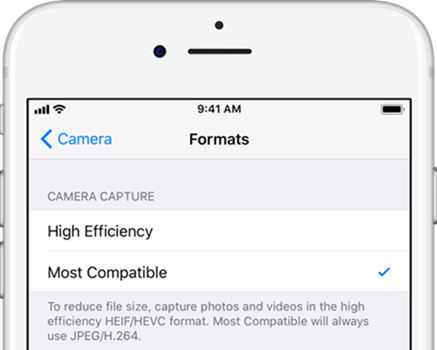
If you want to get rid of these compatibility issues altogether, you can set your iPhone to shoot JPG rather than HEIC. As “High Efficiency” is selected by default in the latest iOS version, you have to go to Settings > Camera > Formats > change the selection to “Most Compatible”. Please note that JPG files are bigger and take up a lot more of the phone storage than HEIC files.