How To Fill Black Area Of Panorama Photos With 3 Methods
There are times when you need to use image stitching in order to merge two or more images together which results in a continuous panorama photo. On one hand, the process fixes all the differences and distortions in the picture and on the other hand, it causes some dark/black areas or some empty areas in it.
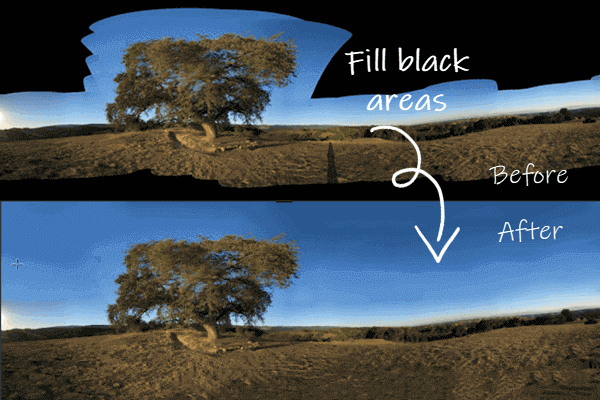
If you decide to just crop your image in order to get rid of that dark/black area or missing pixels, you will have to compromise with the content of the picture. You might have to lose some important parts of the picture and ruin the entire composition, which is not generally appreciable.
But don’t worry, there are some alternate solutions available out there for you to use in such cases. There are many tools that can help you easily fill black area of a panorama photo. Below we have listed some of the most popular such tools and methods:
Method 1. Fill Black Areas Of Panorama Photos With Jihosoft Photo Eraser
Jihosoft Photo Eraser is a tool that you can use to easily erase or remove any undesired object or part from your photograph. Apart from these, there are many other wonderful features in this tool which makes it stand out among other similar photo editors available in the market. You can make use of this tool to remove dark areas from panoramic photos also. Here is how this program can restore black area from the surrounding parts of a photo:


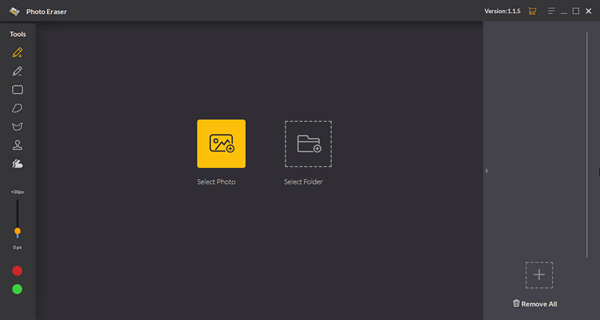
Step 1: Open the panoramic photo in Photo Eraser
Click on the “+” icon in the middle part of the program interface to load a photo. You can also directly drag and drop a photo into the interface.
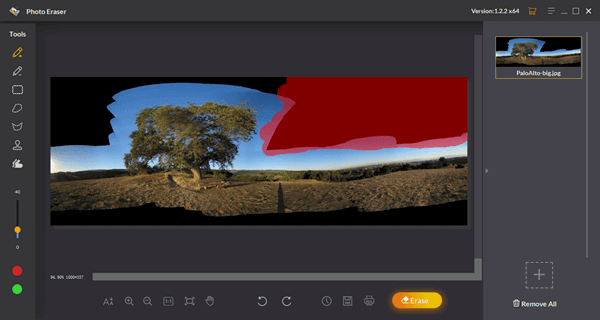
Step 2: Select the dark area on the photo
Use the Selection Brush Tool to select the black area and then run the restoration process by clicking on the “Erase” button to fill the edge of panorama. Just repeat this operation for each black area on the panoramic photo.
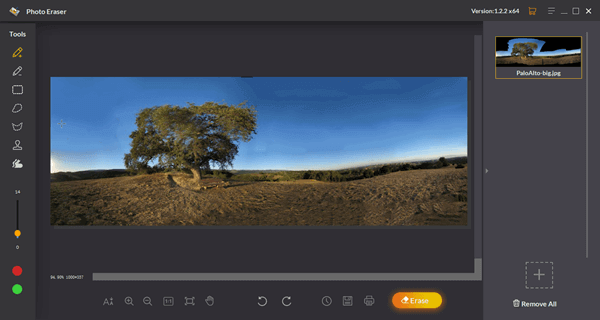
Step 3: Save the result
Photo Eraser automatically restores each area every time you run the restoration process. When you finally get the ideal photo, just save it on your computer.
Main Features Of Jihosoft Photo Eraser
Some of the most important features and uses of this awesome tool are as follows:
- You can use it to remove undesired objects or parts from the photograph.
- Logos and watermarks can also be removed from any picture using this tool.
- With the use of this tool, you can also fill black area of panorama photos.
- Old photographs can be repaired by removing scratches with this tool.
- Whenever there is a need to remove or erase skin blemishes and wrinkles, it is quite efficient in performing that task also.
- You can also remove any text or date stamp from your photo.
- It can also help you in removing or deleting unwanted people from your photographs.
- You can also remove censored parts in your photographs.
- Cloning and moving of the objects in pictures are also possible with this tool.
- It can also repair broken objects and buildings in your photos.
Method 2. Fill Missing Pixels From Panorama Using Photoshop
You can make use of the combination of Crop Tool, Warp Tool and Content-aware Fill Tool in Photoshop in order to fill empty areas of a photo. In this method, we will explain how to stitch panoramic photos with Photoshop and the way to fill the edge of panorama. The whole fixing process is described below step by step:
Step 1: Start with individual photos in Lightroom
When you are in Lightroom, after selecting the range of all images to be merged, click on the sequence by using the right button of your mouse. As soon as you click on it, it will show you a menu. Select the “Edit In” option from the menu, which will further display a sub-menu. Select the “Merge to Panorama in Photoshop” from the sub-menu.
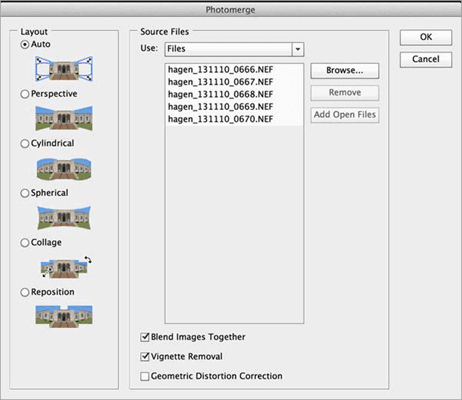
Step 2: Set preferences in Photomerge window and combine layers In Photoshop
Then Photoshop’s Photomerge window will be opened up in front of you. Select “Auto” from the various options available for layout. And, also check the boxes for “Blend Images Together” and “Vignette Removal” options provided below in the dialog box. And, then click “OK”.
Once you are finally in Photoshop, go to Layer > Flatten Image or Merge Visible. It will combine or merge all of the layers so that the picture may be flattened.
Step 3: Fix the area with missing pixels
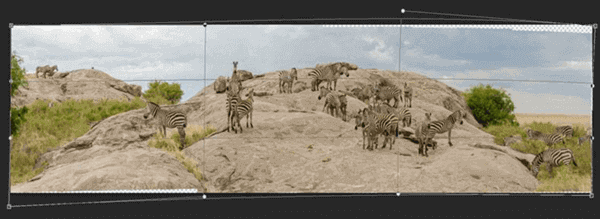
When you are in Photoshop, the empty area or the area with missing pixels or data will look as transparent.
Go to Edit > Transform > Warp. It will create a control box across the image. You can use this control box to warp your image. All you need to do is just click on the area from where you want to warp the image and then drag it towards any corner. It will help you fill the frame of the picture in a better way. But don’t warp too much otherwise it will produce deformations in the picture. Once you are done with a balanced warp, press the “Return” or “Enter” key from your keyboard to finally set the warp.
Step 4: Crop the image
The next step is to crop your image with the use of the “Crop Tool” available in Photoshop. Crop in such a way that it suits very well to your subject matter.
Step 5: Use Content-Aware Tool
Now select an empty region or a region with missing pixels. You can use any type of selection method (like using the “Lasso Tool”) to select that region. Once you have selected it, activate the “Content-Aware Tool”. It can be activated by going to Edit > Fill and then choosing the “Content-Aware” from the pull-down menu. And, set the mode of blending as “Normal” and keep the opacity as 100%.
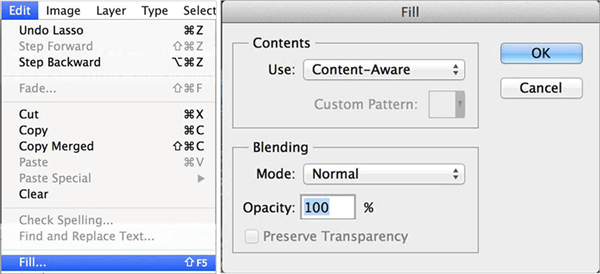
Once you have activated this tool for the selected region, it will automatically replicate its surrounding area. And, if you are not happy with the job done by this tool, you should undo the previous changes and try it again after selecting the region in a slightly different way.
Step 6: Fix other regions with Content-Aware and save the photograph
Repeat the same process to fix the other remaining regions with the use of the “Content-Aware Fill”. Once you are done with the fixing process and happy with the result, save the photograph wherever you want to save it on your computer. And that’s it.
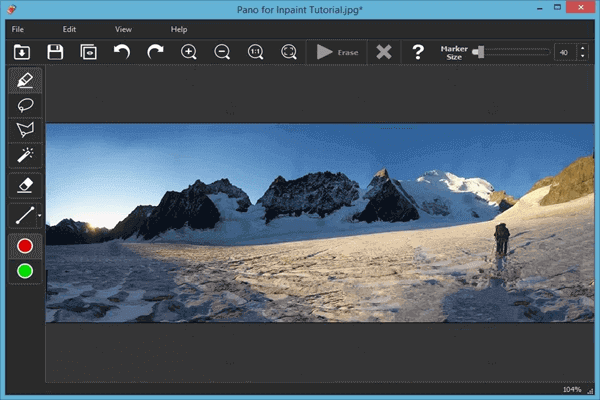
Method 3. Remove Dark Areas from Panoramic Photos Using Inpaint
Inpaint is a useful photo restoration software which is very easy to use and you don’t need to be technical to start using it. You can follow the steps given below in order to fill the black edge of panorama photos in Inpaint:
- Step 1. First, open your picture (with dark areas) in the Inpaint.
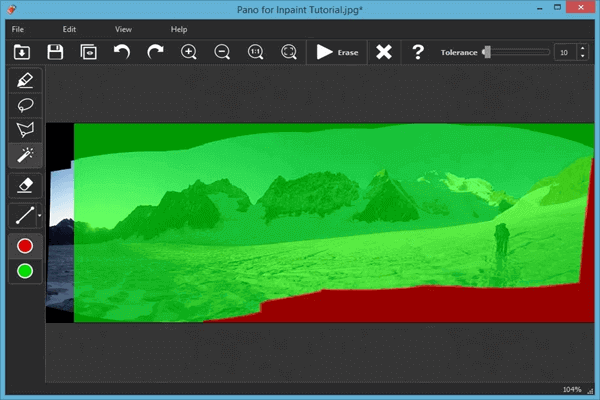
- Step 2. Go to the toolbar and select the “Magic Wand Tool”. This tool comes with a Tolerance Slider that decides the range of color to be selected when you click on the initial point of the photo.
- Step 3. Use the “Magic Wand Tool” to select an dark area in the image.
- Step 4. Run the process of restoration. Once you are done with fixing one dark area in the picture, repeat the same process for fixing the other remaining dark areas.
- Step 5. Finally save the changes after you have got the desired results.
Besides filling the edge of panorama photos, you can also use it for the following purposes:
- For removing any unwanted objects/elements from the photos.
- You can also use it for repairing old photos.
- Defective skin in a picture can also be improved with the use of this software.
- For the removal of watermarks and date stamps
- And, many other things.
Final Words
People feel delighted to get immersed deeply in panoramic photos while looking at them. But this feeling can be disturbed if there are some dark or empty areas in the picture. Why compromise with the quality when you have so many tools and methods to get rid of these issues of dark areas and missing pixels? Just choose any one method that suits your requirements in order to fill empty areas of a photo right now.