Best Image Cropper – How to Crop Photos With/Without Photoshop
No matter whether you need to remove unwanted parts or objects/subjects from your picture or just need to alter its aspect ratio, cropping is the operation that you may need to perform. Unlike resizing images that only changes the image size, cropping photos is actually the process of cutting and removing the undesired outer parts from photos. And, a tool used to perform this cropping operation is called an Image Cropper or a Photo Crop Editor.

Almost all photo-editing software or tools offer a crop tool or image cropper because cropping photos is a general editing operation. You can also make use of advanced graphic design software like Photoshop or even use some free, simple, and lightweight photo editing tools. Below, in this article, we have covered some of the best image croppers for Windows users and also the online image cropper for cropping/cutting images online. And, as a bonus, in the last, we have also explained how to free crop in Photoshop in a few simple steps. So just keep reading till the end.
PART 1. Photo Crop Editor Free Download For Windows Users
1) Photos App
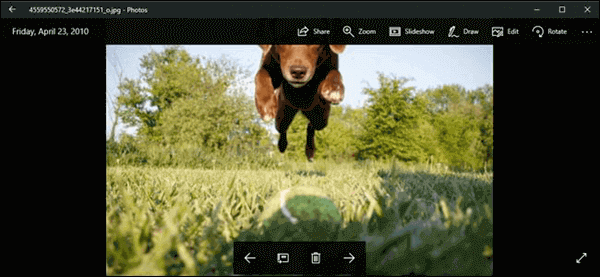
How to crop a picture in Windows 10? The answer is to use Photos app. It is an app that comes in-built with Windows 10. Although the app does not offer so many editing tools or options, yet there are some basic options, including a cropping tool also. But if you need to crop pictures into shapes, you will learn from here. In order to accomplish the task of cropping photos, you will need to follow the steps given below:
- Step 1. First, open the photo in the Photos app on your computer.
- Step 2. Then go to the “Edit” and click on the option “Crop and Rotate”.
- Step 3. You can simply select any of the preset aspect ratios (like 4:3, 16:9) of your choice by clicking on the “Aspect Ratio”. Or you can also manually set the cropping area by dragging the circles/handles provided at the corners of the cropping border/box.
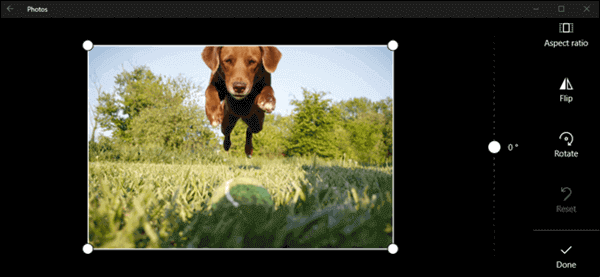
- Step 4. Once you are done with it, click on “Done” to save the changes. And if you don’t want to apply changes to the existing original image, you can also use the option “Save a Copy”. And, that’s it.
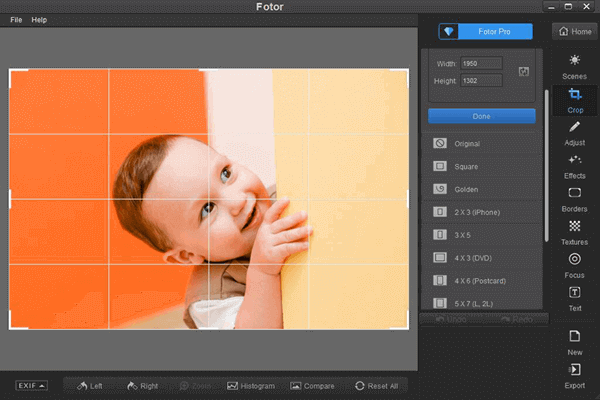
2) Fotor
Fotor is a user-friendly software that you can surely consider for the purpose of cropping pictures on your computer. In order to crop images, you can simply select a preset aspect ratio (like 4:3, 16:9, etc.) of your choice, or you can also drag and drop the cropping part using the handles.
Apart from cropping, with this software, you can also perform other optimization operations on your images like correcting lens distortion, horizontal/vertical distortion, resizing, touching up, teeth whitening, etc. The app also offers a large number of filters and effects which make it easy for you to create an artistic picture also. Moreover, if there is a need to edit multiple images at once by applying the same edits to all, this is also possible with this useful software. However, if you need to erase something unwanted from the photos, we recommend this Photo Eraser software as it can not only help you remove unwanted persons, buildings, watermarks, censored boxes from photos, but also enables you to clone yourself in photo.


3) BatchPhoto
This is another program that you can use on your computer so as to crop images. As the name indicates, the app is mainly specialized in editing images in batch. It simply means that you can easily crop multiple images at once by using this amazing bulk image cropper.
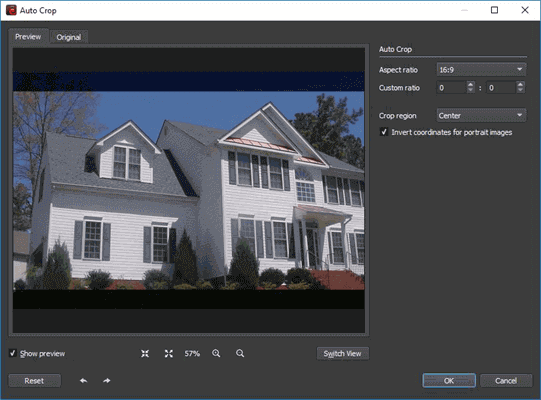
When it comes to the process of cropping images with this tool, there are two options: Crop and Auto-Crop. When you apply an Auto-Crop, it will automatically crop the image using a preset aspect ratio, such as 1:1, 4:3 or perhaps 16:9. But if the preset aspect ratio doesn’t match your requirement, you can go for the other option and enter your own custom aspect ratio to choose the desired cropping region.
Apart from cropping, you can also perform some other optimization operations on your photos like resizing, rotating, converting, etc. There are also options for making color corrections like adjusting the contrast, brightness, and saturation. The best and the most useful part of this software is that it allows you to save your current setting as Profiles and you can load them later whenever you want to use the same edits. And, you can also add a logo watermark and date stamp on your photos.
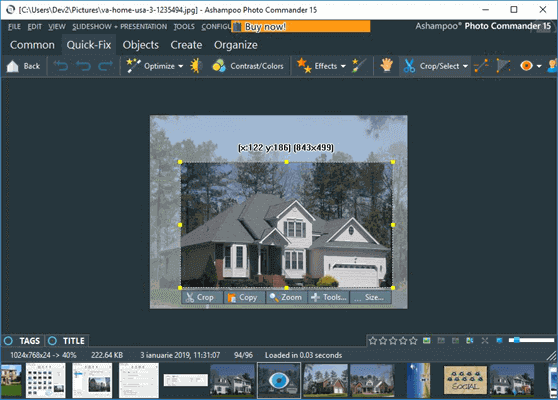
4) Ashampoo Photo Commander
It is quite easy to perform a cropping operation on a photo with this program on your computer. In order to crop pictures, you will just need to perform the simple steps given below:
- Step 1. While holding down the left button of your mouse, drag the pointer so as to select the required cropping area.
- Step 2. Once you have selected the required portion of the image, you will have some options for cropping the image, copying the selection and applying other editing options to choose from. In order to perform the cropping operation, choose the option which is meant for cropping.
Note: There is also an option for choosing a preset aspect ratio for your cropping border in this app.
Apart from cutting images, you can also perform some other editing tasks with this amazing app. Some of such tasks include adjusting colors and contrasts in the photos, rotating and resizing photos, applying various effects, etc. You can also create slideshows using the photos available in your collection. And if you are in need to apply the same changes to multiple photos, it can be done with the batch-processing feature offered by the app.
Last but not least, you can use this software not only for optimizing your photos but also for organizing photos in a proper way according to your own criteria.
5) Topaz Studio
Topaz Studio is also an app that offers many useful image-editing tools, including the cropping tool. With this software, you can also crop your images in bulk. While cropping, you can use the drag and drop method for cropping the image roughly. There is also an option for entering a custom value for the height and width of the cropping area. And you can also select a preset aspect ratio if you don’t need to enter the custom values.
There are some other optimization and editing tools available in this amazing program. You can use these tools to enhance your photos by resizing, straightening, rotating, applying artistic effects and merging multiple photos together.
PART 2. Online Image Croppers
1) ResizeImage
Resizerimage.net is an amazing free online photo-editing website that you can make use of for the purpose of resizing, optimizing, converting file into JPG, and cutting images online. The accepted image formats are JPEG, PNG, GIF, and BMP. All you need to do to edit your image is just visit the site through your browser and upload the image to start editing. But remember that the website supports the images with the size of no more than 100MB and 100 MP, and for the GIF file, the maximum size is 30MB and 10MP.
If you want to perform a cropping operation on your image, you will need to select the cropping area by clicking and dragging the preview image. Or you can simply fill the ratio of the cropping area in the available boxes. Once you are done with finalizing your cropping area, just click on the “Crop” button to finally complete the operation. After that, you can further edit the picture, for instance, make background transparent, choose output image format, depending on your preference.
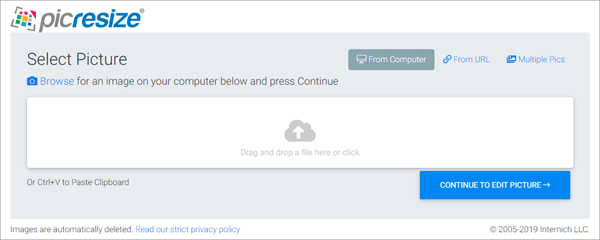
2) Picresize
Another popular free online tool for image editing is Picresize.com which also offers the option to crop images online. All you need to do is just visit the site’s homepage and simply drag and drop an image to the given position. If you need to cut several images at a time, just choose the “Multiple Pics” option to add multiple images for cropping. Once you have selected the desired image from wherever it is stored on your computer, click on the “Continue” button. Finally, the image will be uploaded to the Picresize.com and then you can start your editing process. You can also edit an image from a website by entering the image’s URL.
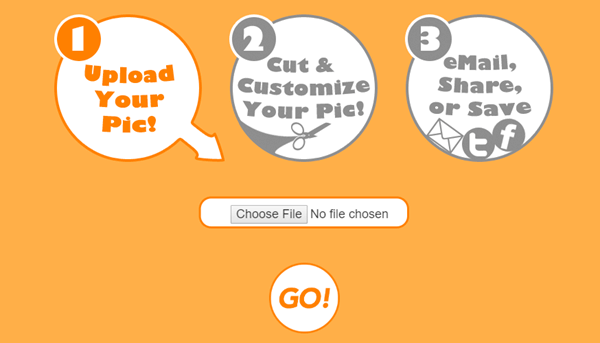
3) CutMyPic
It is another online tool that you can use to crop and add color to your photos. CutMyPic.com is a free website that doesn’t even require your registration to be able to use its service. But it does not accept the images with the size of more than 500X500.
All you need to do to start cropping your images is just to visit the website, and then select the image by clicking on the “Choose File” button. Once the image is selected, just click on the “OK” button to complete the task.
4) Cropp.me
This is an online cropping tool that offers free, as well as a paid version. The most important feature of this tool is its Auto-cropping feature that can automatically search, find and suggest the region which is most suitable for cropping. Anyway, you are also able to define your size and crop your image in a custom way. Moreover, it enables you to crop multiple photos at a time and get them downloaded in a ZIP file.
As a free user, you can use some of its services for free without signing up. However, you can crop only up to 5 images in a day. If you want more, you will have to sign up for a paid account.
PART 3. How To Crop Images Using Photoshop?
For cropping photos using Photoshop, You will need to follow all the steps mentioned below:
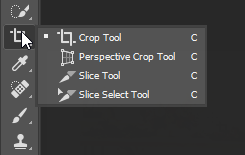
Step 1: Activate The Crop Tool
First, launch Photoshop on your computer, and then load the image which you want to crop. Go to the toolbar given on the left side and select the “Crop tool”. You can also activate the crop tool by pressing the “C” letter from your keyboard.
Step 2: Reset The Crop Tool Settings
Once the “Crop tool” is activated, a cropping box will be created around your image. The cropping size which you applied to your last cropped image will be taken automatically into your current image to be cropped.
You will first need to reset the crop tool to its default cropping size or default settings. In order to reset the crop tool’s default settings, go to the “Option bar”. Right-click on the “Tool” icon if you are using Windows. And, if you are using Mac, you will have to “Control+click” on the “Tool” icon.
Once you have right-clicked the “Tool”, it will display a menu of options. Now you have to select the option “Reset Tool” from the menu. Once you select it, the “Crop tool” settings will be restored to its default. As a result, the Aspect Ratio is set as just “Ratio” and the fields/boxes showing the height and width will get empty.
Step 3: Make The Cropping Border/Box Surround The Entire Image
As a default, the cropping box is not along the border of the image. You will have to press the “Esc” key to make the cropping box surround your entire image. But remember that if you don’t see the cropping box anymore on the screen after pressing the “Esc” key from your keyboard, you will first need to select any tool other than the “Crop tool” from the toolbar and then select the “Crop tool” again.
Step 4: Resize The Cropping Border
Now that you have the cropping box surrounding your entire image, it’s time to resize the box/border. There are 2 methods for you to do that, as given below:
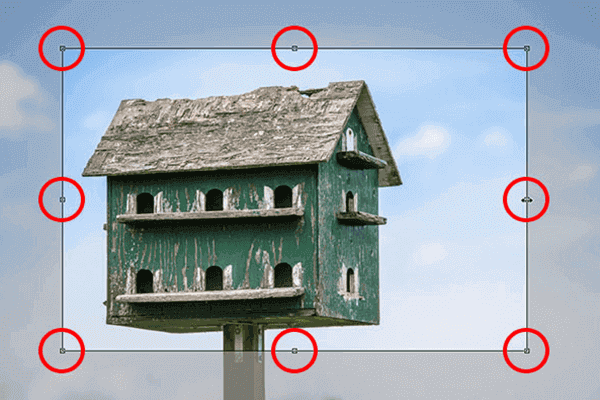
Resize By Handles
There are small-sized handles around the cropping box/border. They are eight in total. There is one handle at each corner and one handle in the middle of each side of the box. You need to simply click and drag the handles in order to set the cropping size. Keep in mind that the area outside the border/box will be removed and the area inside the box will be kept.
Resize from “Option bar”
If you want to resize the cropping border with a specific aspect ratio instead of roughly resizing it using the provided handles, you will have to enter the exact cropping aspect ratio in the “Option bar”.
You can also select a preset aspect ratio for cropping your image. For this, first, click on the option “Aspect Ratio” available in the “Option bar”. As soon as you click on this, it will show the list of preset aspects ratios like 1:1, 8:10, etc. Select any one of them as per your requirement.
If you don’t find the required aspect ratio in the list of presets, you can also enter it manually in the boxes available on the right side of the option for presets.
Step 5: Position The Cropping Box In The Right Place
Once you have resized the cropping border, it’s time to move the border over the image so as to place it in the right position. All you need to do to reposition it is just to click inside the border and then drag it.
And, if you have resized the aspect ratio from the “Option bar”, the ratio will be automatically locked. So you can drag the cropping border without holding the “Shift” key.
Step 6: Crop The Image
Once you have finalized the ratio and the position of your cropping border, it’s the time to finally crop the image. Go to the “Option bar” and click on the Checkmark icon. This can also be done by simply pressing the “Enter” key from the keyboard if you are using Windows. And, if you are using Mac, this is possible by pressing the “Return” key. And that’s it.
Final Words
All of the image croppers mentioned above are the best ones for you to crop images on your computer. You can choose any photo crop editor of your choices to give a final touch to your images.