How To Whiten Teeth In Photo With And Without Photoshop
Sometimes there is just a need for whitening teeth of the subject in a photo in order to make it look perfect. Quite a few people lack confidence in their smiles in front of the camera because of their yellow teeth. So, a light touch of whitening and brightening effect on the teeth area of the picture can make a big difference that you won’t like to ignore. But the question that arises here is how to whiten teeth in photo mixed with a brightening effect. Below we have discussed the topic in two sections: How to whiten teeth in Photoshop and How to whiten teeth using free teeth whitening photo editor app. So just keep reading to have a better understanding of the whole process to whiten teeth in photos.
PART 1. How To Whiten Teeth In Photoshop
You should follow exactly the same steps as given below in order to be able to brighten teeth in Photoshop:
Step 1: First, open/load your picture to be edited in Photoshop. From the toolbar available on the left-hand side, select the “Lasso Tool”. With the use of “Lasso Tool”, select the area covered by the teeth in the photo. Don’t worry about the accuracy because we will be able to make corrections later. But, be as accurate in your selection as possible.

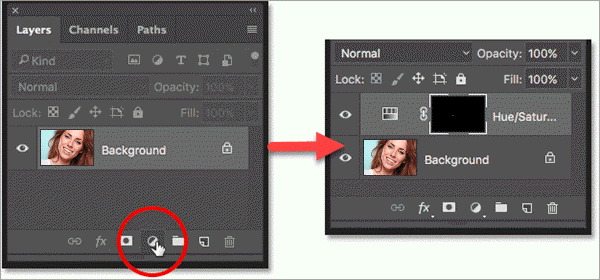
Step 2: Go to the layer panel and click on the “New Fill or Adjustment Layer” icon which is provided at the bottom part of the panel. This icon is actually a half-filled circle. Once you click on the “New Fill or Adjustment Layer” icon, it will show a list of some options. Select the “Hue/Saturation” option from the list. It will make the Hue/Saturation adjustment layer appear. The position of the new layer will be just above the position of the background layer in the layer panel.
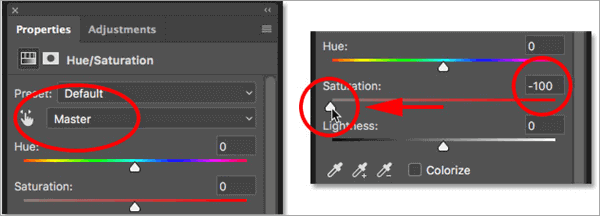
Step 3: Now go to the properties panel and set the “Edit” option as “Yellows”. By default, it is set as “Master”. Drag “Saturation” slider to the left in order to lower it for the yellow color on the teeth. But remember not to lower it so much that it starts looking unnatural for the teeth. Once you are done with your setting of saturation value for the yellow color, you should set the “Edit” option as “Master” again in the properties panel. Now it’s the time to brighten the teeth. Drag the “Lightness” slider to the right in order to increase the brightness of the teeth. But here also, you should not brighten them so much that they start looking unnatural.
Step 4: Your brightening operation must have left some effect on some other areas around the teeth if you haven’t selected the teeth accurately. You don’t have to worry about that, because you can correct it with these simple steps. Select the “Brush Tool” from the toolbar. Now we have to paint a black color over the unwanted area selected around the teeth. For this, first, set your foreground color as black so that the “Brush Tool” can paint a black color wherever it is rubbed over. By default, the foreground color is set as white. You can use the “color swatches” provided in the toolbar so as to set it as black if currently, it is white.
Step 5: Once you have set the foreground color, start rubbing the brush tool over the unwanted area (unnecessarily whitened and brightened) around the teeth. But make sure that the size of the brush tool is small enough to make you able to use it easily over the required area. If the size of the tool is large, you should make it as small as you need. Thus you will be able to end up removing the whitening and brightening effect from the unwanted area around the teeth by rubbing the “Brush Tool” over there. While painting over the unwanted area if you rub over the wanted area of teeth by mistake, you can correct it by changing the foreground color to white and then rubbing again over that area.
Step 6: Finally, you are done with the whitening and brightening of the yellow teeth in your photo. Now you should save the changes you have made. And, that’s it.


Besides the yellow teeth, facial blemishes also prevent you from smiling again. To remove the unwanted stuff, such as skin defects, censored box, watermarks and logos from the photos, you can try this easy-to-use, yet powerful Photo Eraser software if you don’t have the Photoshop package on your computer.
PART 2. Teeth Whitening Photo Editor Apps
If, for some reason, you cannot use Photoshop for whitening the teeth in your photos with a computer, you can also make it by using some apps on your smartphone. Yes, you heard it right. You can surely use any teeth whitening app for Android/iPhone in order to remove the yellow color from the teeth in your pictures. Below we have mentioned some of the best teeth whitening apps for Android and iPhone users:
#1 AirBrush
AirBrush is an app that you can use to take a selfie and then make the required editing using the tools available within the app. Using this amazing app, you can easily whiten teeth in photo, brighten eyes, and remove acne, wrinkles, scars and many other unwanted elements from the picture in order to improve it. Moreover, it also offers popular tools for removing the red-eye and adjusting makeup in a photo.
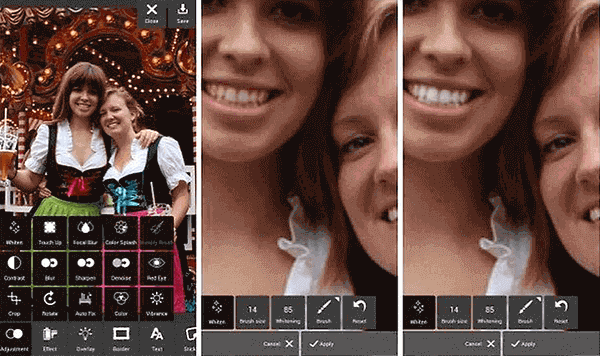
#2 Pixlr
It is a highly professional photo makeup refinement editor which offers many advanced tools and features which you can use to edit and enhance your photo. By using Pixlr, you can effortlessly remove various types of defects from your photos, including the red-eye defect. It also facilitates the functionality to whiten teeth in a photo. Furthermore, it also can be used to enhance skin color and eyebrows. By the way, Perfect365 has a Windows version too so that users can enhance their facial images on computer.
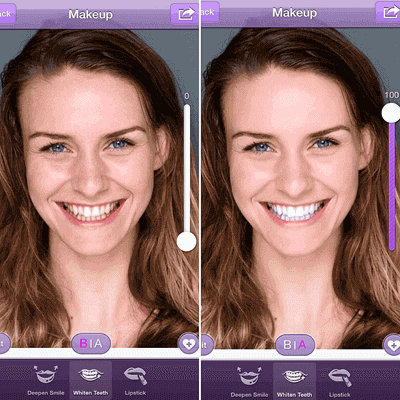
#3 Perfect365
When it comes to a free virtual makeup app, Perfect365 comes out to be the best app with 80 million subscribers. The photo makeup application is very easy to use. It offers various tools which you can use to apply many effects in your photos like applying lipsticks, shadows, liners, etc. Every week, you will find new and latest styles from makeup artists and experts. Along with the other amazing features, it also offers the tool to whiten the teeth in any photo.
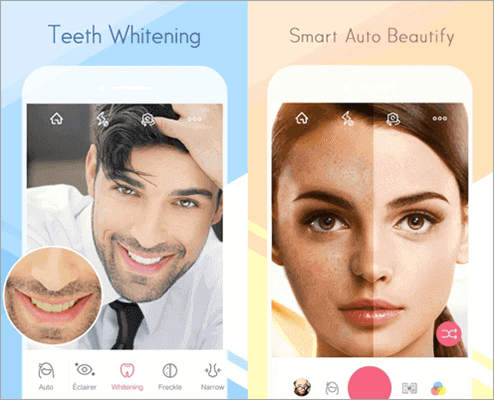
#4 Sweet Selfie
This is one of the must-have photo editing apps for every lover of good selfies, because it will help users customize and create a wonderful selfie in just a few touches. Sweet Selfie offers lots of filters to its users to whiten teeth, correct color, and add different effects to the photos. This app even can help you turn a normal photo into a glamorous one with many funny stickers and AR filters.
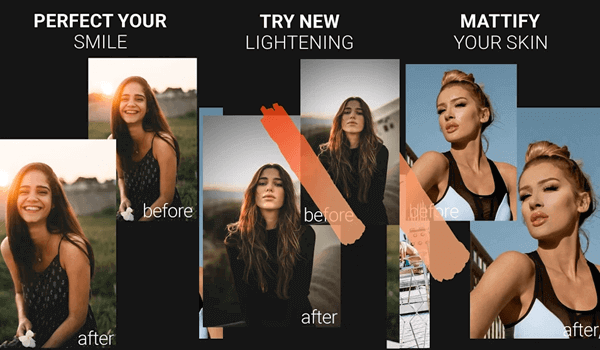
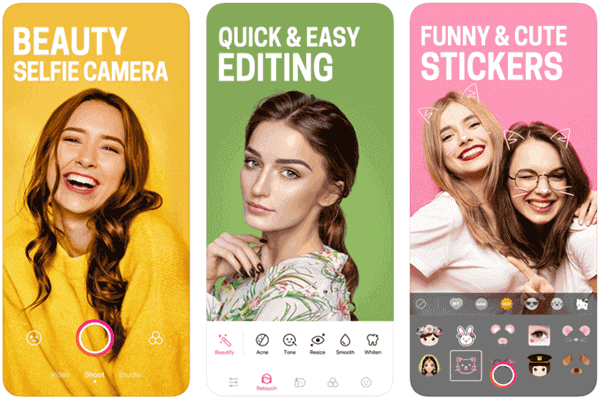
#5 BeautyPlus
Last but not least is BeautyPlus. It is another teeth whitening app for both Android and iPhone. BeautyPlus does deserve your attention. The app offers many simple but useful photo editing tools, AR filters, visual effects and many other features which you can use to improve the quality of your photos. Along with the other powerful tools and features, it comes with a teeth whitening function also that makes your smile shine on all your selfies.
Conclusion
I hope this article has furnished you with enough knowledge about the topic “How to Whiten Teeth in Photo”. So just go and make your photos look better by using these teeth whitening tools and methods mentioned above.