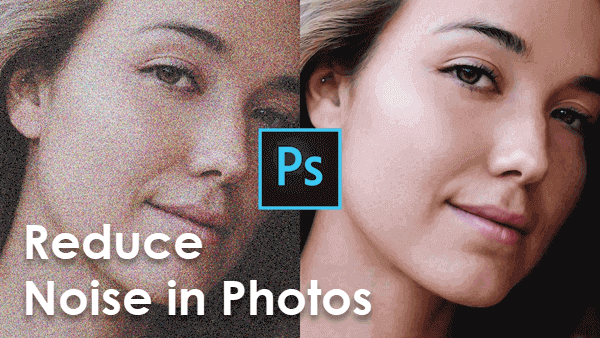
How To Avoid And Reduce Noise In Photos With/Without Photoshop
In case, you shoot with a very high ISO setting or long exposure pictures, it ends up creating pictures with the pixels that don’t represent the correct exposure or color of the scene. Such pixels in the image are referred to as noise which can make an image look bad and unappealing.
Just like the unwanted object that you must want to remove from the photo with an Photo Eraser software, noise in photo is so annoying too. So the question is how you can avoid such noise in photos while shooting? And still, if you end up with the photos with noise, how can you reduce it later in post-production? Below we have answered the questions about how to avoid noise as well as how to reduce noise in photos respectively.


PART 1. Tips to Avoid Noise in Photos
In order to avoid noise in pictures, you will need to keep the following things in mind while shooting:
Do Long Exposures Carefully
There is no doubt that you will need to make use of long exposures in many cases. Shooting with long exposures results in wonderful pictures. But it must be kept in mind that too long exposure may make the sensor of your camera start heating up. And, it will become the reason for the pixels of your image to render incorrect exposure and color, which will eventually make your image noisy. So it is recommended not to shoot at an exposure longer than what is actually required by your camera to give the best result.
Use Lower ISO Setting While Shooting
When you shoot at high ISO exposure, the sensor of your camera ends up grouping together the pixels so as to capture extra light. This kind of grouping of pixels causes noise in your picture. And, on the other hand, shooting at lower ISO results in photos with less noise. Hence always keep the perfect ISO settings while shooting.
Use Noise Reduction Available in Your Camera
While shooting at a long exposure or with a high ISO setting, you should turn on the noise reduction function available in your camera. Such a function can be identified with the name as “Long Exposure Noise Reduction” or “High ISO Noise Reduction”. If this function is turned on, your camera will automatically analyze each and every image after shooting. During its analysis, if there is found any incorrect rendering of pixels that may cause noise, it will automatically correct it. So the issue will be fixed by your camera automatically if you make use of this in-camera function. Thus you will be successful in avoiding noise in your photos.
Shoot In RAW Format
Images in JPEG format already have some compression or noise in them. And, if the images in this format are shot with a high ISO, it will result in more noisy pictures. Hence it will be better if you shoot your photos in RAW format whenever there is extra darkness in light. Another advantage of using RAW format while shooting is that as compared to JPEG format, the images with RAW format have better flexibility when it comes to reducing noise from them in post-production.
PART 2. How to Reduce Noise in Photoshop
If you haven’t been successful in avoiding noise while shooting your photos, there comes up the need to reduce it later in post-production. You can make use of some photo editing software like Photoshop in order to fix this issue. The best tool that we recommend for this is Photoshop.
There are mainly two types of noise found in pictures: Luminance Noise and Color Noise (also known as Chroma Noise). Luminance Noise refers to the brightness of a picture and on the other hand, while Color Noise is the distortion of colors in the picture. You can tell which kind of noise it is by zooming in the photo. If you see red, green and blue dots, this means it is Color Noise. But if you see black, white, and gray dots, then it is Luminance Noise.

#1 Reduce Luminance Noise
Whenever you want to reduce luminance noise in Photoshop, you can follow the steps mentioned below:
Step 1: Open image
First, launch Photoshop on your computer or PC and open the image that has luminance noise.
Step 2: Select Lab Color
Go to the menu bar and click on the “Image”. Select “Mode” from the “Image” menu and then select “Lab Color” mode.
Step 3: Create a new layer
Now drag the background layer to the “Create New Layer” icon to create a new layer. Thus all the changes that you will make affect only the new layer and your original image will remain intact. In other words, the original image will not be affected by the changes you are going to make.
Step 4: Choose the Lightness channel
Choose the “Lightness” channel which will be used to remove luminance noise from your picture.
Step 5: Create new channel
Now you will need to make a copy of the “Lightness” channel, so that you will be able to make changes without affecting the original channel.
Step 6: Apply effect to newly created channel
Go to the menu bar > click on the “Filter” > select “Filter Gallery” > select “Stylize” > finally select “Glowing Edges”. Once you select it, it will detect the edges available in the picture and show them in white color.
Step 7: Invert channel
Now click on the “Image” provided in the menu bar. Hover over the “Adjustment” and then choose “Invert”. After that, the channel will be inverted. Next, press the “Ctrl” for PC (“Command” for Mac) and click on the newly created channel. By doing this, you will be able to select the white areas.
Step 8: Blur the selected areas
Go to the menu bar again and select the “Filter” > “Blur” > “Smart Blur”. Then set the quality as high in the “Smart Blur”, set the “Radius” to a lower value, and set “Threshold” value to around 10. In this way, there will not be too much blur added to your photo and the details of the photo will not be damaged.
Step 9: Set Opacity
Now it is the time for setting the opacity. For this, go to the layers palette and set it based on your needs so as to refine the original layer’s details.
Step 10: Flatten Image
After making all the changes to your image as mentioned in the above steps, you should flatten the image now. In the Menu bar, click on the “Layer” and then “Flatten Image”. Thus the image will get flattened and you can save it now. If you want to switch back to RGB mode, just hover over “Mode” and then choose “RGB Color”.
#2 Reduce Color Noise
When it comes to reducing the color noise in photos with the use of Photoshop, you will need to follow the steps mentioned below:
Step 1: Open photo
First, launch Photoshop on your computer or PC and open the photograph in which you want to reduce the color noise.
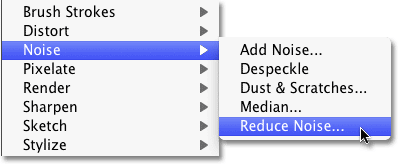
Step 2: Select Reduce Noise
Go to the menu bar and click on the “Filter”, choose “Noise” and then choose “Reduce Noise”. After that, the dialogue box of Reduce Noise will open up.
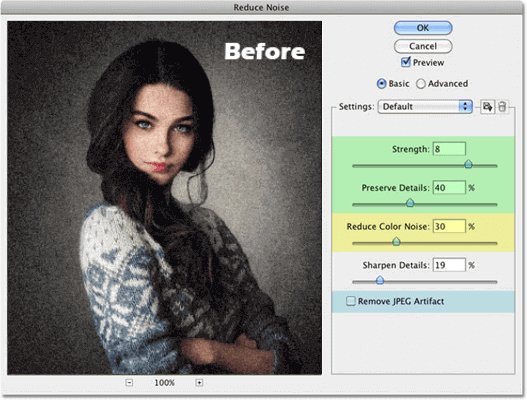
Step 3: Set the slider of Reduce Color Noise
In the dialogue box of “Reduce Noise”, you will get to see a slider for “Reduce Color Noise”. You will have to gradually drag this slider to the right direction so as to adjust it for the best value. You can see the result in the preview while you are dragging the slider. Keep on dragging it until the color noise in the picture gets fixed.
PART 3. Software to Reduce Noise in Photos Online
When it comes to how to make photo noise reduction online, there are plenty of online tool to consider. Below we have listed some of the best websites that you can make use of in order to make your photos noise-free:
#1 Photo Kako
Photo Kako is one of the best online photo editing tools that also offers the feature to remove noise from photos. In order to remove noise, you will need to follow the steps mentioned below:
- Step 1. First, go to website and click on the “Choose file” button to select and load the image (from your computer) that needs editing. You can also enter a web URL of the image apart from selecting the file from your computer.
- Step 2. Enter a required value for “Denoise”. You can also simply drag the slider to set the value. You can see the changes in your image in the preview displayed on the right side of the interface.

- Step 3. If you are happy with the effect produced in the image after removing the noise, you can download the edited image by simply clicking the “Download” button.
#2 Pixlr
Pixlr is also another online tool that offers general photo editing options including the noise reduction feature as well. The steps to be followed to remove noise from the photos are as follows:
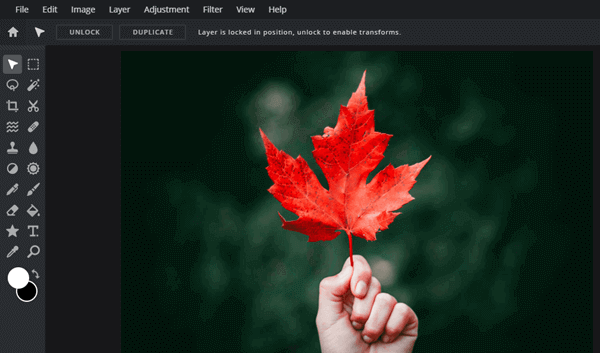
- Step 1. First, visit the website and open the picture that you want to edit.
- Step 2. Go to the menu bar and click on the “Filter”. From the “Filter” menu, select the “Denoise” option. Once you select this option, it will immediately remove the noise from your picture. And, that’s it.
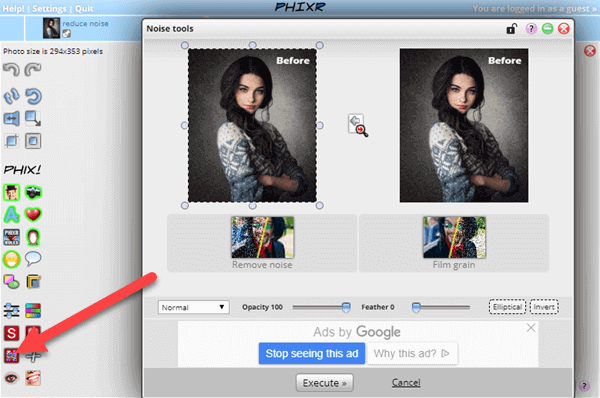
#3 Phixr
The online photo editing tool Phixr also offers the feature to reduce noise in photos online. There are three modes of noise removal to choose from: weak, fast and strong. Follow the steps mentioned below so as to remove noise with the use of this tool:
- Step 1. First, go to the website and upload the photo that you are willing to edit. You can either import the photo from your PC or enter a web URL of the image.
- Step 2. Now click on the “Remove Noise” tool. Once you click on it, the noise reduction tool will be opened up in front of you.
- Step 3. Select a denoise option on the basis of the noise in your picture.
- Step 4. Finally, click on the “Execute”. Once you are done with the process of noise removal, you can share/download the image, if you don’t want to make any other type of editing in the image.
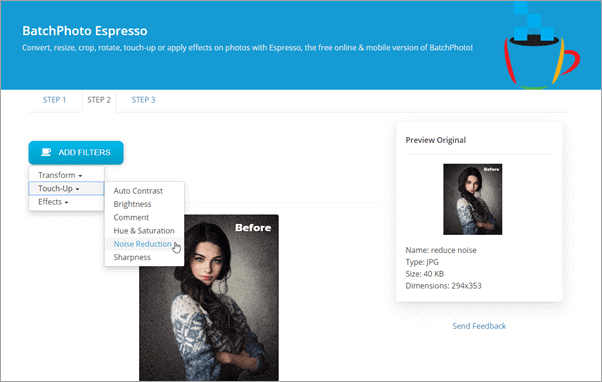
#4 BatchPhoto Espresso
If there is a need for online noise reduction in photos in batches, you can go ahead with the BatchPhoto Espresso which allows you to add multiple photos to be processed at a time. And, the noise reduction can be executed in a single click for a number of photos. Apart from the noise reduction function, it also allows you to touch up, convert and resize photos and more.
#5 Enhance.Pho.to
Enhance.Pho.to is another online tool that you can make use of in order to remove noise from your photos. Apart from the feature to remove noise and grain in photos, the tool offers some other useful features like deblur photos, correct lighting, fix red-eye in photos and some other basic enhancement options also. However, it doesn’t offer an option for changing the denoise parameters. The noise will be removed automatically as soon as you click on the Denoise option.
#6 Pine Tools Remove Noise Online
Pine Tools also offers the service of reducing noise from photos online. You will need to follow the steps given below to achieve that goal:
- Step 1. First, open this photo noise reduction online tool and click on the “Choose File” button in order to select the desired file (that needs to be edited) from your computer.
- Step 2. Once you select and open the target image file, its preview will be displayed just below the “Choose File” button. Now click on the “REMOVE NOISE” button provided at the bottom.
- Step 3. As soon as you hit the “REMOVE NOISE” button, the noise gets removed from the image and a preview of the final image immediately appears on the right side of the interface.
- Step 4. Now click on any of the “PNG”, “JPG” and “WEBP” options of format as per your requirement. These options are provided just above the preview of the final image. As soon as you click on any of these options, the final image starts getting downloaded in the format you have selected. And, it’s done!
Final Words
Noisy photos are generally created when you shoot with your mobile phone or low-quality camera. But sometimes the high-quality professional cameras also end up creating the photos with noise. The reason may be any but the noise in photos is never appreciable. It is necessary to either avoid or reduce it, so in this article, we have explained the types of noise and how to reduce noise in photos. All methods above are useful, just choose one according to your needs.